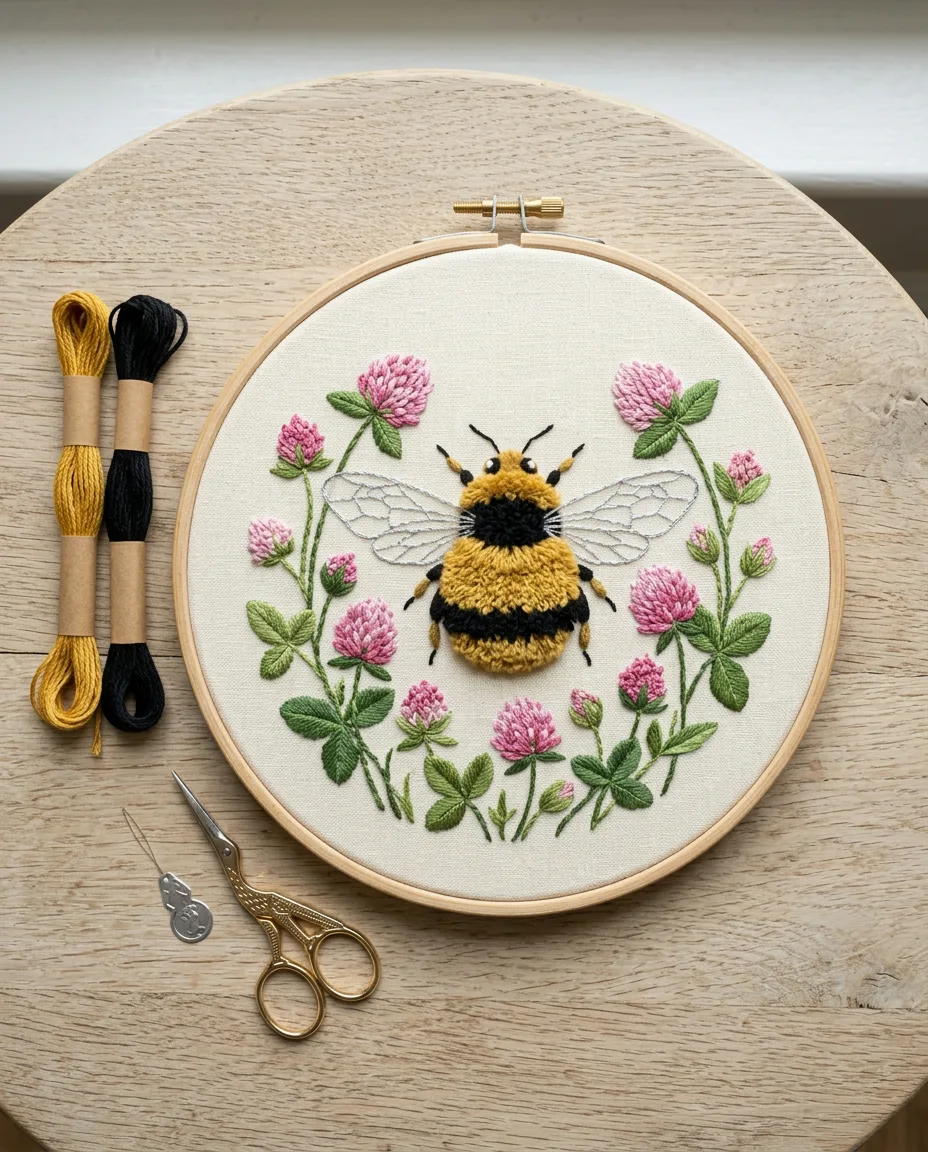
You want a bee on your hoop that looks soft enough to stroke, and flat satin stitch will never get it there. Turkey work will. It is a row of small thread loops, each one pinned down by a tiny stitch, that you cut and brush into a short pile like a rug. On a body 1 inch long, that pile catches the light the way a real bumblebee’s fuzz does.
None of it is hard. It is slow, though, and a little fiddly. Plan on about an hour for one bee at the size below, most of it spent on the body. Everything flat gets stitched first, and the fuzz goes on last.
How to stitch the fuzzy bee
Six-strand floss is sold as one thick thread made of six fine strands twisted together. Cut an 18 inch length, pull single strands out one at a time, then lay the number you need back side by side. Three strands make a pile dense enough to hide the fabric underneath.
- Hoop the fabric until it is drum-tight. Draw an oval body about 1 inch long and 5/8 inch wide, tilted slightly upward at the head end. Mark four stripes across it, alternating yellow and black, plus a small round black head at the front.
- Draw two teardrop wings above the body, each about 5/8 inch long and leaning back toward the tail. Add six legs, three on each side, each a line about 1/4 inch long. Two curved antennae come off the head.
- Stitch the wings first. Outline each one in backstitch with 1 strand of white or metallic thread and the size 9 needle, stitches about 2 mm (just under 1/8 inch) long. Run one more line of backstitch down the middle of each wing as a vein.
- Work each leg with 2 strands of black. One straight stitch is enough, or use two short stitches that meet at an angle like a bent knee.
- Backstitch the antennae with 1 strand of black, stitches about 1.5 mm long. Finish each tip with a French knot made with 2 strands wrapped once around the needle.
- Thread 3 strands of black into the size 5 needle and start at the bottom edge of the tail stripe. Turkey work is backstitch where every other stitch stays loose. Come up 1.5 mm ahead of your line, go back down into the starting hole, and pull that first stitch tight so it locks the thread.
- Come up 1.5 mm ahead again and go back into the last hole, but stop pulling while a loop about 5 mm tall still stands on top. Follow it with one tight backstitch, which pins the base of the loop in place.
- Keep alternating one loop and one tight stitch along the row. Start each new row about 1 mm above the last, working from the bottom of the stripe to the top. Hold finished loops up and out of the way with your thumb so the needle doesn’t catch them.
- Fill each stripe in its own color, then fill the head in black. Leave the ends of each thread as loops too, since they get cut with everything else.
Stripes blur where they meet, and a little blur looks natural. Too much turns the body muddy. Keep the last yellow row and the first black row in separate rows of holes. Shared holes are what make the stripes smear.
Why stitch the flat parts first? Loops get in the way of everything. A needle passing near cut pile drags strands down into the fabric, and they never fluff back up. Stitch the body first and you fight the fuzz for the rest of the project. Working the wings and legs first also gives you a clear edge to fill up to. The pile then spills slightly over the leg tops, which looks right on a real bee.
Cut and brush the loops into a round body
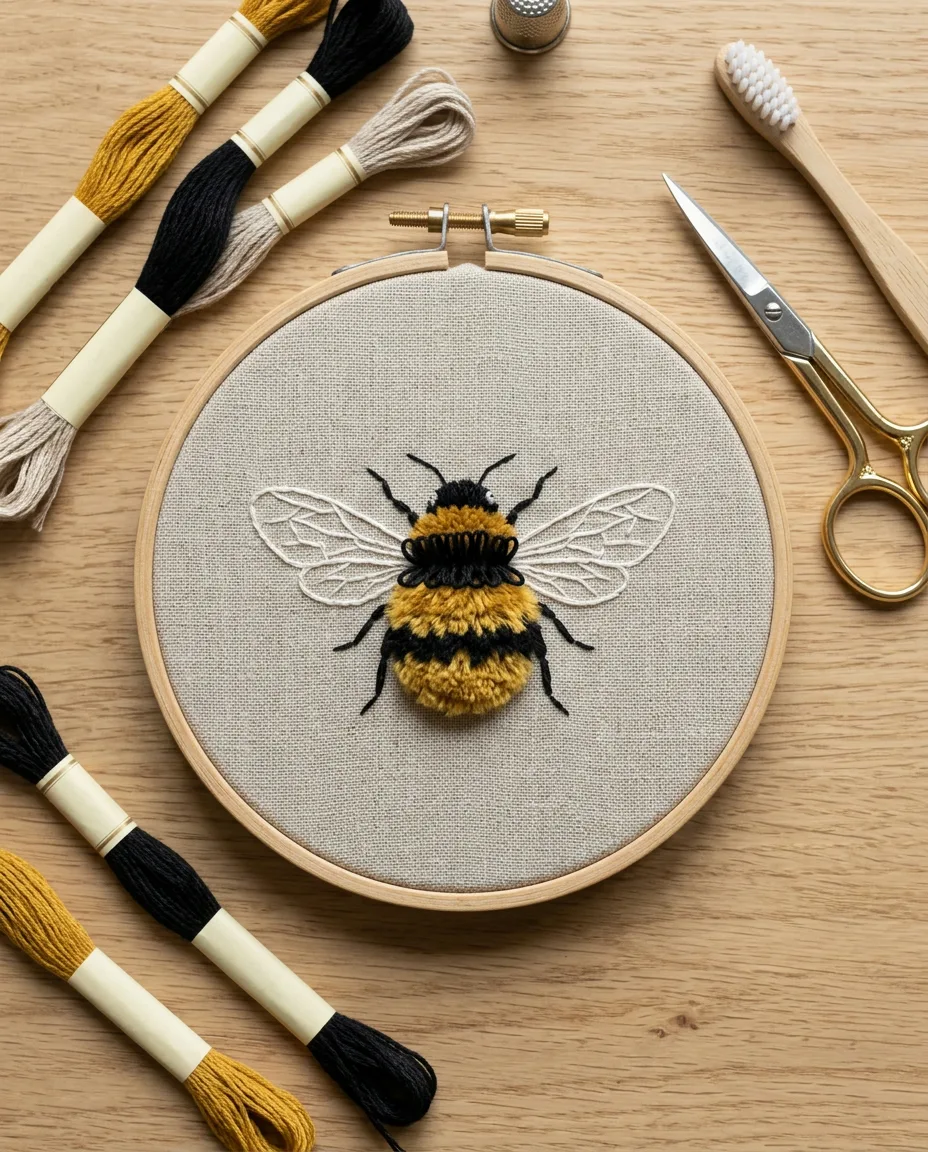
This is where it becomes a bee. Slide the tip of your scissors through three or four loops at a time and snip across the tops. Don’t cut close to the fabric yet. Once every loop is open, brush the whole body firmly with the dry toothbrush for about a minute. The strands untwist and puff up into a soft pile.
 Save
SaveNow shape it. Trim the edges shorter than the middle, so the pile sits about 2 mm high along the outline and 3 to 4 mm high down the center. That low dome is what makes the body look round instead of like a flat square of carpet. Brush again after every few cuts, because stray ends hide in the pile and only show up once they are fluffed. Hold the scissors flat, parallel to the fabric, and take off a little at a time. Tilted blades gouge a dip that no amount of brushing hides. A finished body should feel springy when you press it with a fingertip.
Go slowly here. Cut pile can’t be put back. A bald spot means picking out stitches and reworking that part of the stripe.
A smooth satin stitch bee is faster
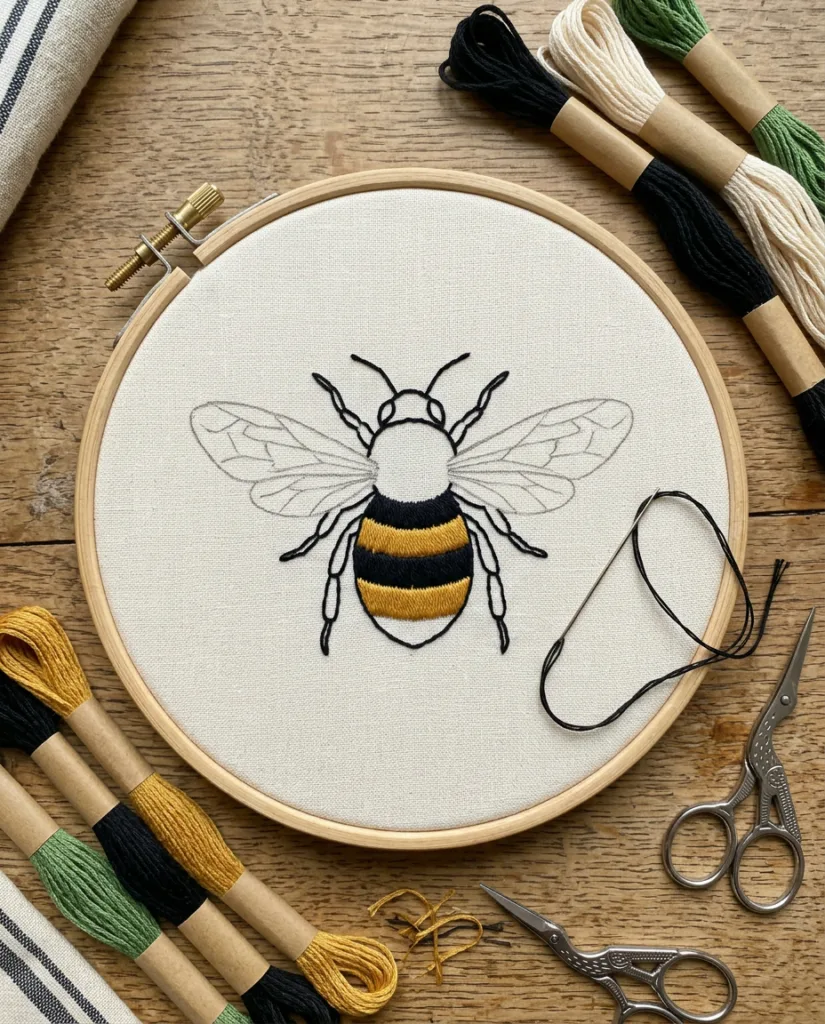
About 20 minutes. That is all a satin stitch body takes, and it lies flat, which suits bookmarks and anything else that gets rubbed or handled. Satin stitch is a set of straight stitches laid side by side, so close together that no fabric shows between them.
Use 2 strands and the size 5 needle. Stitch each stripe across its short width, so no single stitch runs longer than about 6 mm (1/4 inch). Longer stitches snag on fingernails and sag after a wash.
 Save
SaveFor crisp edges, outline each stripe first in split stitch. That is a line of short stitches where the needle comes up through the middle of the stitch before it, splitting its strands. Then work the satin stitches over the outline. The raised edge keeps each stripe from spreading into the next.
Adding wings and a clover backdrop
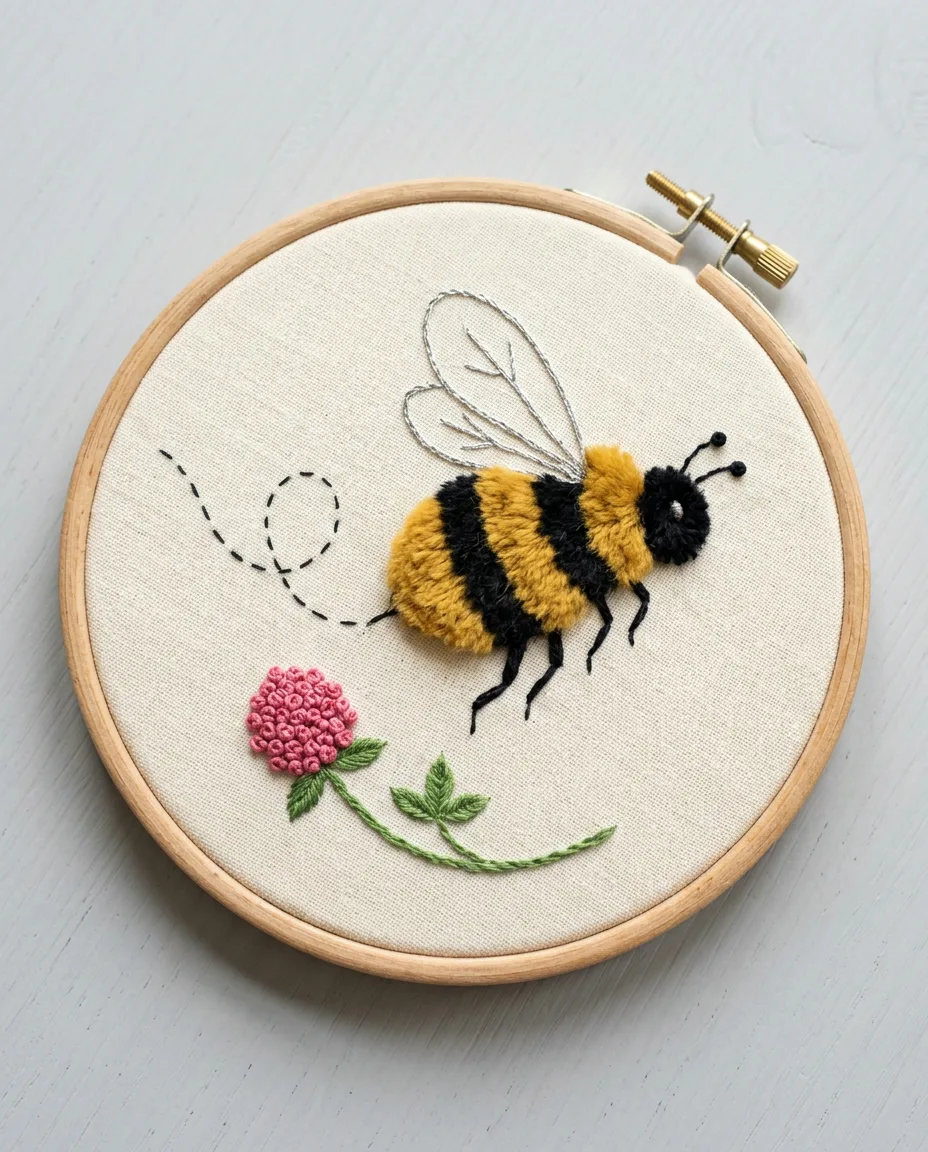
A bee stitched perfectly level looks pinned to a board. Tilt the whole body 15 to 20 degrees, head up, and it looks like it is climbing through the air.
Clover gives it somewhere to go. Stitch a cluster of pink French knots about 1/2 inch across, 2 strands and one wrap each, packed so they touch. Give it a curved stem in stem stitch with 2 strands of green, stitches 3 mm long. If your knots keep pulling through to the back, the French knot guide covers the usual cause.
 Save
SaveBehind the bee, a looping line of running stitch reads as a flight path. Use 1 strand of black with dashes about 3 mm long and gaps the same size. Keep it faint. A heavy dotted line pulls the eye away from the fuzz, which should stay the main event.
Metallic thread for the wings frays fast. Cut it no longer than 12 inches and knot it through the needle’s eye if it keeps slipping out.
Tiny bees for shirts and pockets
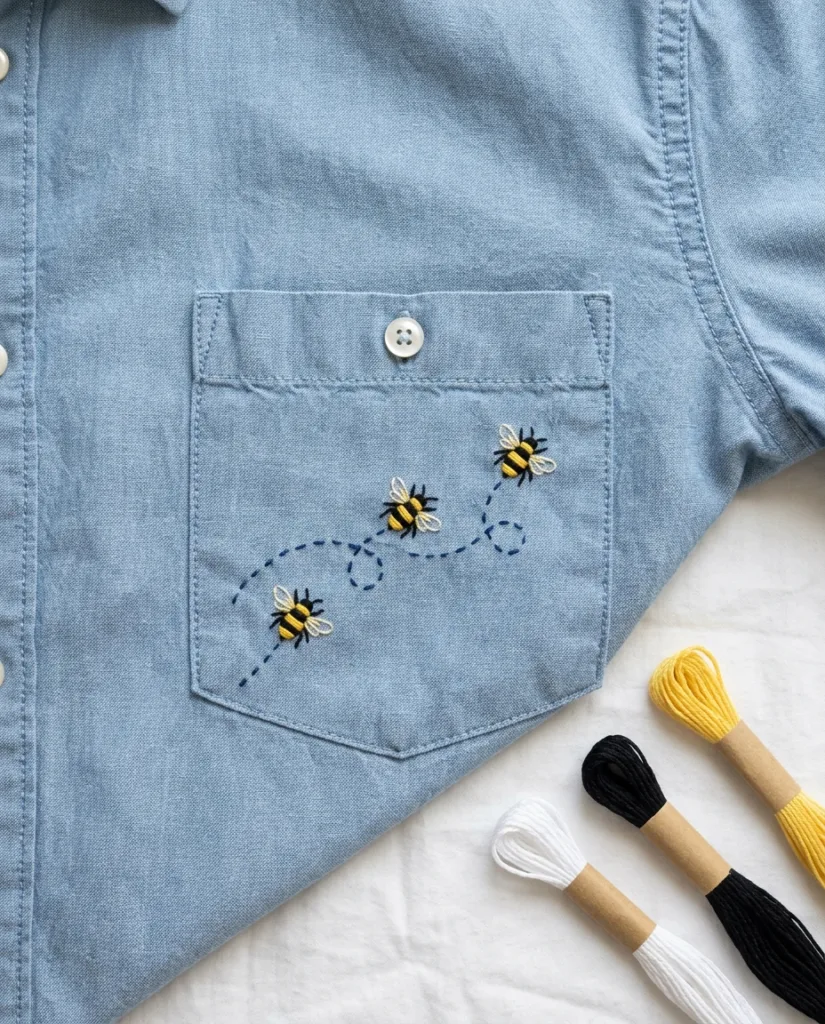
Shrink the bee to 1/2 inch long and it sits neatly on a shirt pocket or a collar point. Turkey work is too bulky at that size, so switch to satin stitch. Two or three stitches per stripe with 2 strands is enough.
Wings get simpler too. Make each one a single lazy daisy stitch in 1 strand of white. A lazy daisy is one loop of thread held down at its tip by a tiny stitch, which gives a teardrop shape with no filling.
 Save
SaveOn a garment, clamp a 4 inch hoop around the shirt’s own fabric, taking care not to catch the back of the shirt inside it. Stretchy knits need an iron-on stabilizer behind the stitching, or the bees will pucker the first time the shirt is worn. The same setup works on denim, and the jeans embroidery guide walks through it on a thicker fabric. Wash the finished shirt inside out in cold water. On a patch pocket, slip one hand inside and stitch through the front layer only, so the pocket still opens. A 3 inch hoop fits most shirt pockets better than a 4 inch one.
When the fuzz goes wrong
Loops that pull out while you work the next row mean the tight stitches weren’t tight. Tug each one snug before you move on. It should sit flat against the fabric with no slack.
Fabric showing through the pile is a spacing problem. Rows more than 1 mm apart leave gaps that brushing can’t hide. Work an extra row between the sparse ones, or switch to 4 strands for the whole body.
A stringy, wispy pile usually hasn’t been brushed enough. Brush harder and longer than feels right. Pearl cotton won’t fluff at all, because its twisted strands can’t be separated, so the body has to be six-strand floss.
And if the bee looks flat even though it’s fuzzy, the pile was trimmed to one height. Cut the outline down to 2 mm and leave the center taller.
For a second small motif to pair with a bee, a sprig of lavender uses the same stem stitch and fits in the same 5 inch hoop.