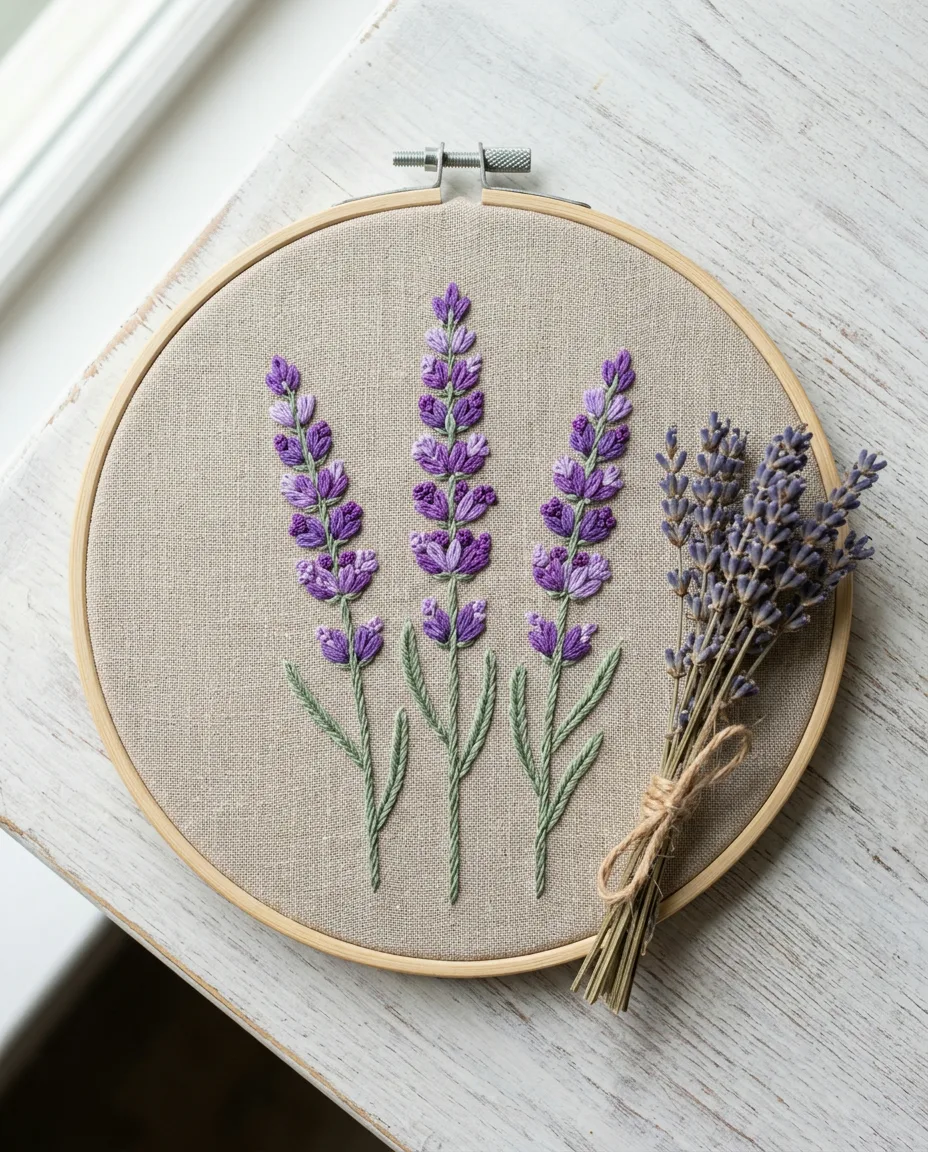
One lavender sprig uses about 20 stitches. Most of them are small petals and knots along a 3 inch stem. That is why it takes ten minutes once your hands know the moves, and why it is the most forgiving flower to learn on. Real lavender is lumpy and uneven, so an uneven stitch looks right.
The first sprig will take closer to 20 minutes. The third one hits ten. Stitch three at different heights and you have a finished 5 inch hoop in about half an hour.
Stitch one lavender sprig
Six-strand floss is one thread made of six thinner strands. Pull two single strands out of an 18 inch length (45 cm) and thread them together. Every part of this sprig uses 2 strands, so you never have to re-split.
- Hoop the fabric until it is tight and flat. With the pen, draw a gently curved line about 3 inches long for the stem. Real stems lean, so skip the ruler.
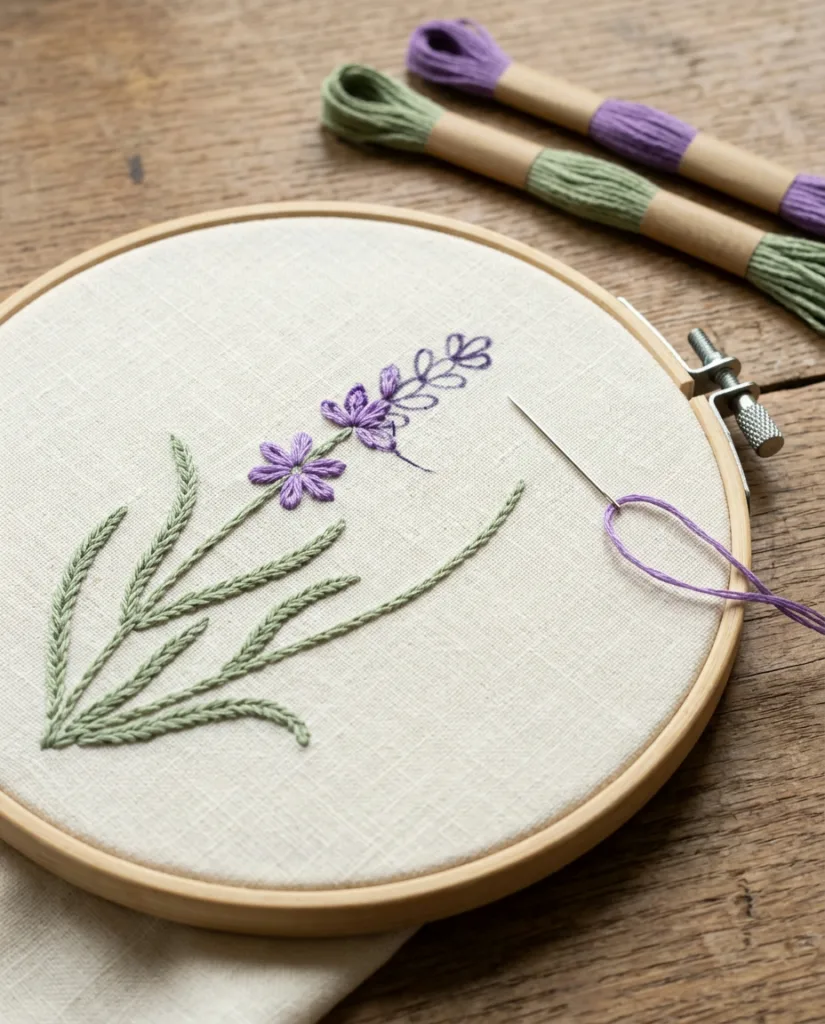
- Thread sage green. Work the stem in stem stitch from the bottom up, with stitches about 4 mm long (just over 1/8 inch). Bring each new stitch up halfway along the one before, always on the same side, so the line twists like a cord.
 Save
SaveStem stitch lavender stalks with one violet flower head half finished - Switch to dark purple. On the top third of the stem, make lazy daisy petals about 3 mm long. Each one is a small loop of thread held down at its tip by a tiny stitch. Angle them upward and alternate left and right of the stem.
- Switch to light purple. Fill the gaps between the petals with French knots, one wrap each. Pack them more tightly toward the tip, where real buds cluster.
- Back in green, add two or three straight stitches about 1 cm long at the base of the stem for leaves. Point them upward at a slight angle.
- Turn the hoop over and weave the thread end under three or four stitches on the back before you trim it.
Rinse away the pen lines with cold water once the whole hoop is finished. Don’t iron first. Heat can set some water-soluble inks for good.
Where the ten minutes go
Timing a sprig shows which part slows people down. The stem takes about two minutes. Leaves take one. Petals take three or four, and the knots eat the rest.
Knots are the bottleneck because they need two hands and a bit of care each time. Wrap the floss once around the needle, then put the needle back down about 1 mm from where it came up. Going down the same hole lets the knot slip through. The full method, with fixes, is in the French knot guide.
If speed matters more than texture, swap the knots for tiny straight stitches about 2 mm long. The sprig loses some of its bumpiness. It also takes six minutes instead of ten.
Why a mixed head looks real
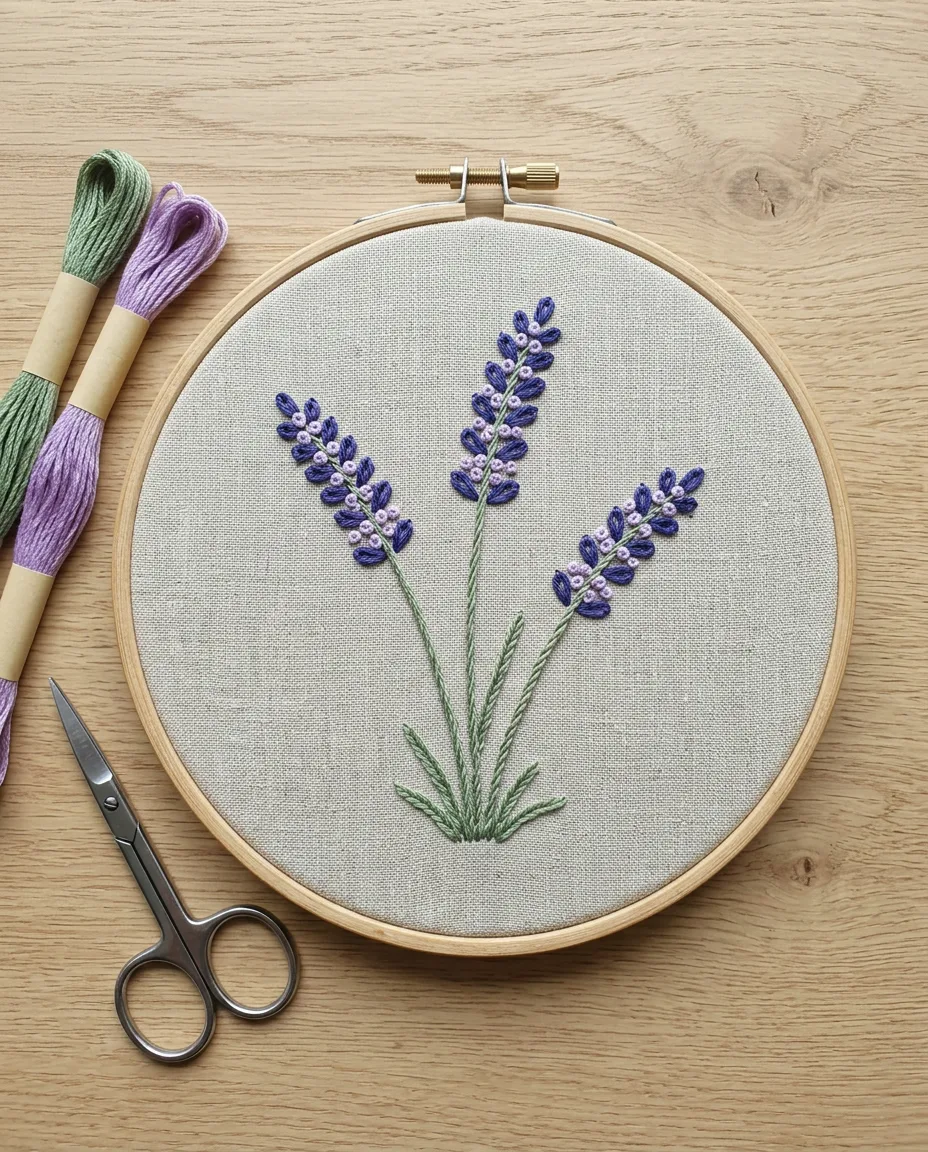
One purple across the whole head reads as a cartoon. Two purples look like a plant. The dark petals sit underneath and the light knots sit on top, so the eye sees depth where there is only thread.
Variation between sprigs matters just as much. Make one stem 3 inches long and another 2 1/2. Push the third to about 3 1/2. Let the tallest one lean further than the others. Start the flower heads at slightly different points on each stem. None of these changes take extra time. Together they are the difference between a real-looking bunch and three identical copies.
 Save
SaveFor a third shade, thread one strand of dark purple and one of light together in the needle. Knots stitched with that blended pair land halfway between the two colors. Scatter a few near the middle of each head.
Arranging sprigs in a hoop
Three sprigs is the right number for a 5 inch hoop. Two looks sparse. Four starts to crowd the edge.
Draw all three stems before stitching any. Fan them out slightly from a shared point about 1 inch above the bottom of the hoop, like cut stems in a jar. Leave at least 3/4 inch of empty fabric between the flower tips and the hoop ring. The hoop’s edge crushes stitches that sit too close, and the finished piece looks cramped.
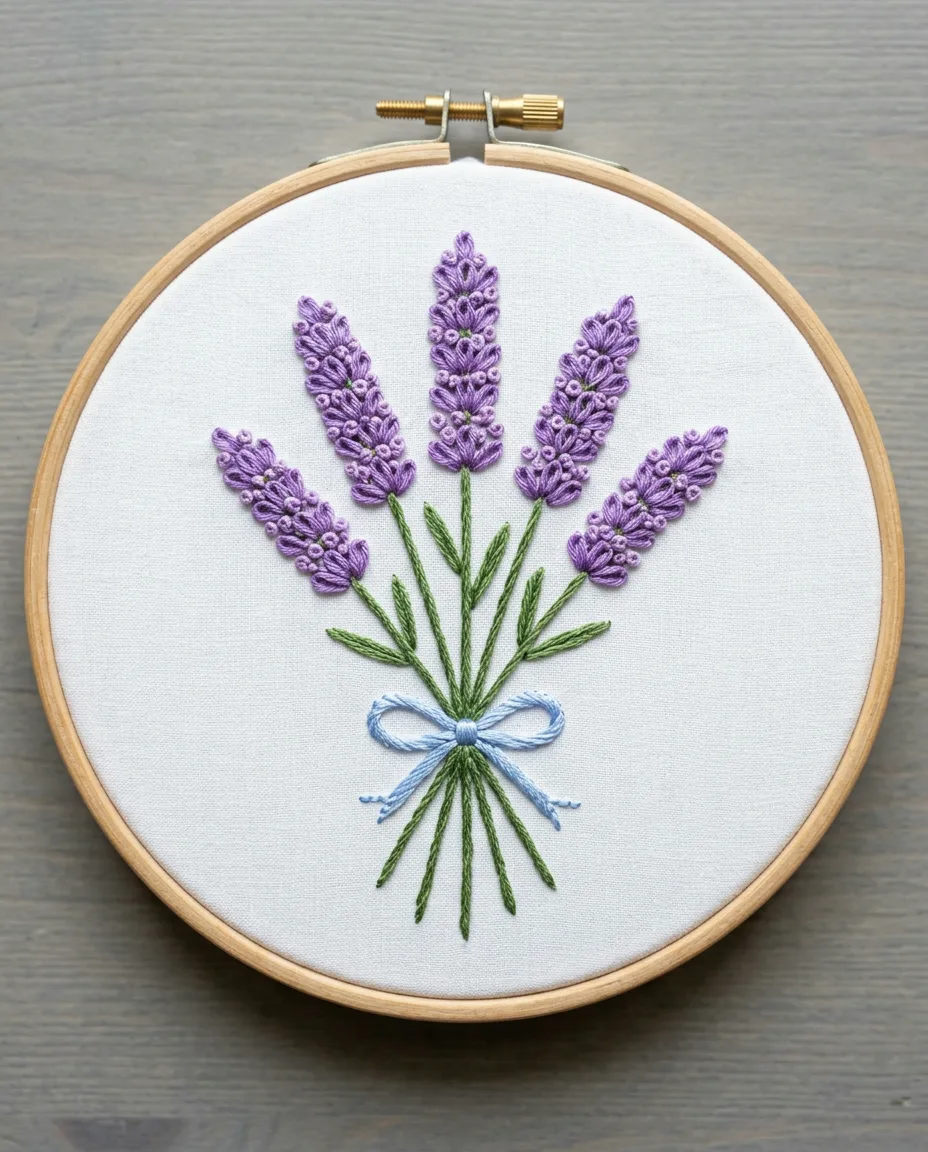
Tied bundles make a nice variation. Stitch five stems that fan out from one point near the bottom. Then draw a small bow across that point and outline it in stem stitch, 2 strands, with stitches about 2 mm long. Pale blue or cream works well for the bow against the purple.
 Save
SaveLavender on linens and small gifts
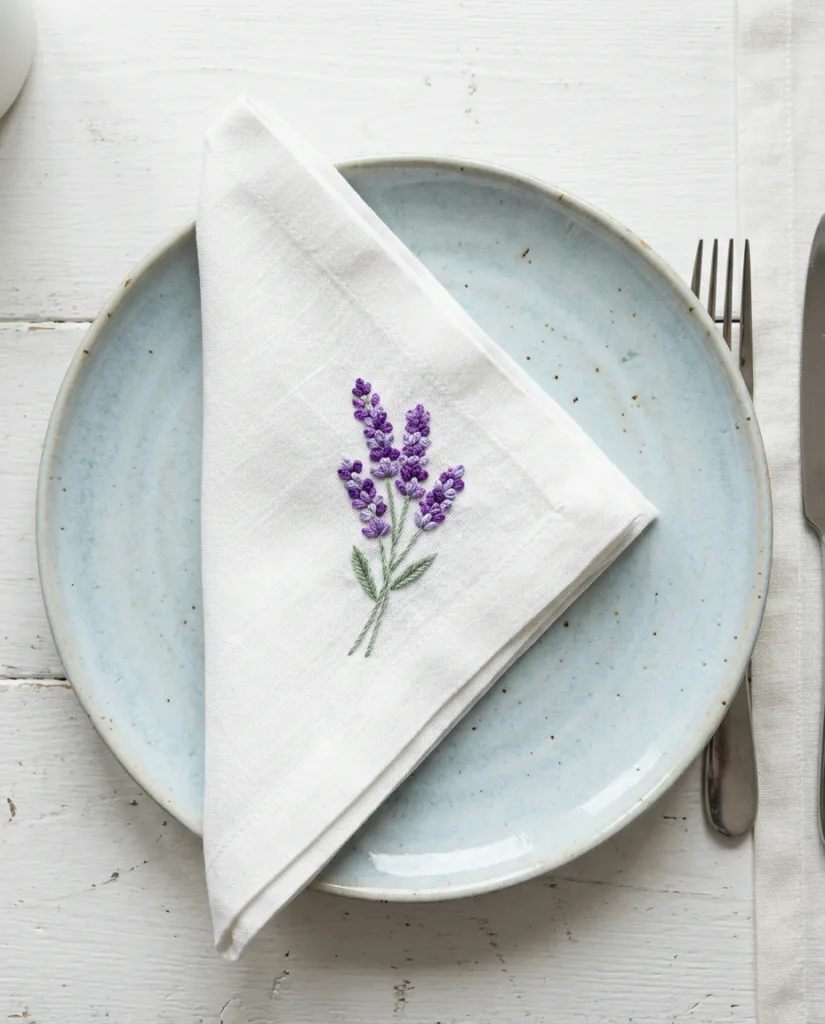
Single sprigs fit almost anywhere a hoop won’t. Napkin corners are the classic spot. Stitch it about 1 1/2 inches in from both edges, angled toward the corner.
 Save
SaveAnything that gets washed needs two changes. Keep the knots to one wrap, since larger knots loosen in the machine. Tie off every color on the back with a proper finish, weaving the tail under several stitches instead of carrying it to the next sprig.
Felt is another good base. A sprig on a strip of felt makes a quick embroidered bookmark, and felt doesn’t need a hoop because it holds its shape. For more quick ideas in the same spirit, see the list of last-minute embroidery gifts.
Picking purples and fabric
Real lavender runs from blue-violet to a dusty mauve. Bright grape purple looks fake beside it. Choose a dark purple with some blue in it, then a light one two or three shades paler from the same color family. Floss makers number their colors, and shades in one family sit close together on the chart, so matching is easy at the store. Hold the two skeins against your fabric in daylight before you buy. On oatmeal linen, the light purple can vanish, so go one shade darker than you would on white. The stem green matters less than people think. Anything muted works, as long as it is grayer than grass.
Fabric choice changes the look more than the stitching does. Linen has a slightly uneven weave that suits a loose, cottage-garden sprig. Quilting cotton is smoother and makes the knots look crisper. Both hold 2-strand stitches well in a 5 inch hoop.
Never use stretchy fabric for a first try.
But knits like T-shirt jersey pull out of shape as you stitch, and the stem wanders. If you want lavender on a T-shirt, iron a piece of lightweight interfacing to the back first. It keeps the fabric still while the needle goes in and out.
Finishing the hoop for a wall
Once the pen marks are rinsed out and the fabric is dry, press it face down on a folded towel. The towel keeps the knots from flattening. Put the fabric back in the hoop, centered, and tighten the screw fully.
Trim the extra fabric to about 1 inch outside the hoop. Run a line of running stitch around that edge with doubled sewing thread, stitches about 1 cm long. Pull it tight so the fabric gathers against the back of the inner ring, then knot it. For a neater back, cut a circle of felt the size of the inner ring and whipstitch it over the gathers.
The screw at the top doubles as a hanger, so no extra hardware is needed.
Common problems with the first sprig
Most first attempts go wrong in one of two places. Both are quick to fix.
Stems that look like a dotted line mean the stitches don’t overlap. In stem stitch, each new stitch comes up halfway back along the previous one. Skip that, and you get backstitch with gaps. Go back to 4 mm stitches with a 2 mm overlap and the line fills in.
Petals that lie flat and wide usually mean the loop was pulled too loose before the tiny tie-down stitch. Pull the loop until it just hugs the needle, then anchor it. And if the fabric puckers around the head, the hoop has come loose. Re-tighten it before the knots, since they are the most tension-heavy stitch in the sprig.