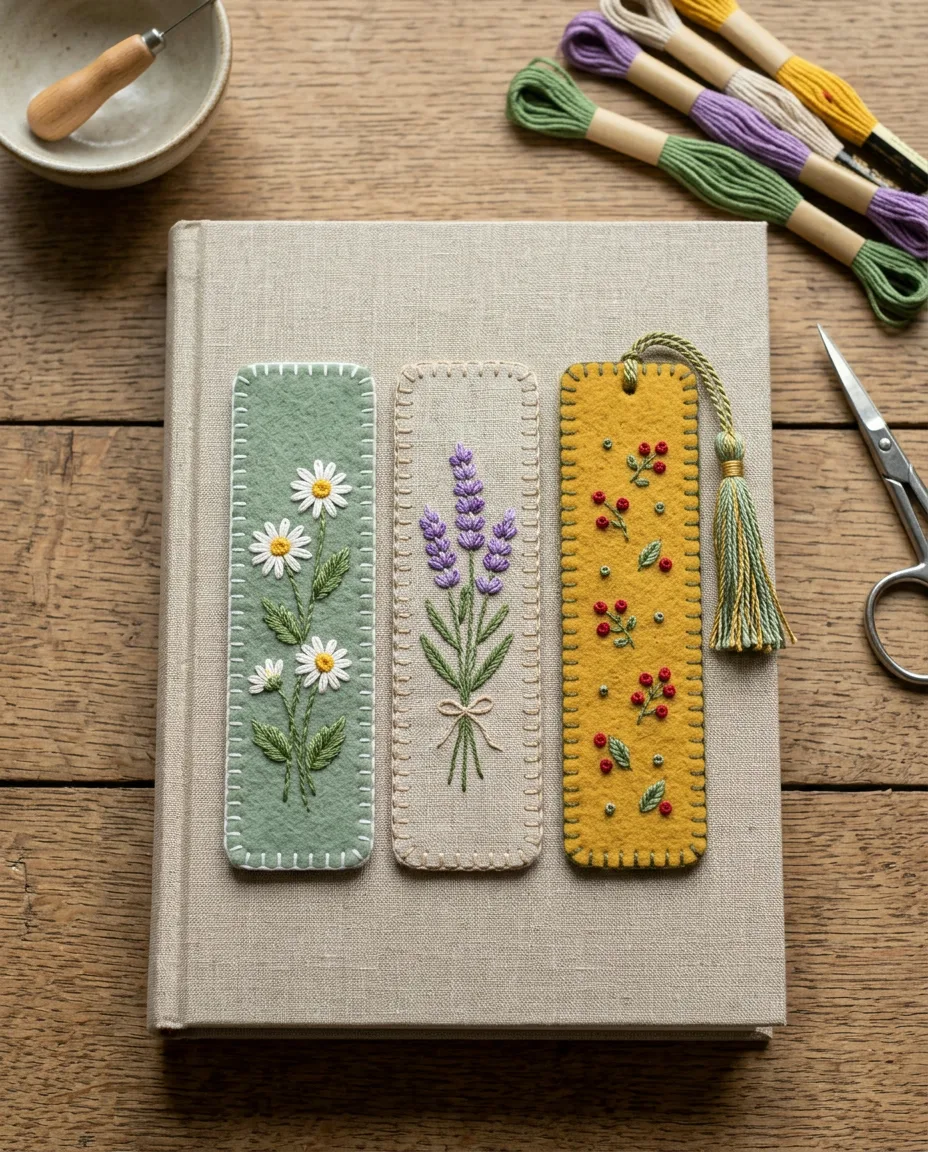
Most people assume a bookmark needs a hoop and a hemmed edge. Felt needs none of them. It doesn’t fray, so the cut edge can stay raw, and a stiff wool-blend felt holds itself flat while you stitch it in your hand.
Linen takes a little more work. You hoop it, stitch the design, then back it with felt so the raw weave never shows. Both versions fit in one evening, about 1 to 2 hours, and both finish with the same blanket stitch edge.
Here is the supply list for either version.
How to stitch the bookmark
Six-strand floss is a loose bundle of six fine threads. You pull out the number you need and put them back together before threading. The design uses 2 strands. The edge uses 3.
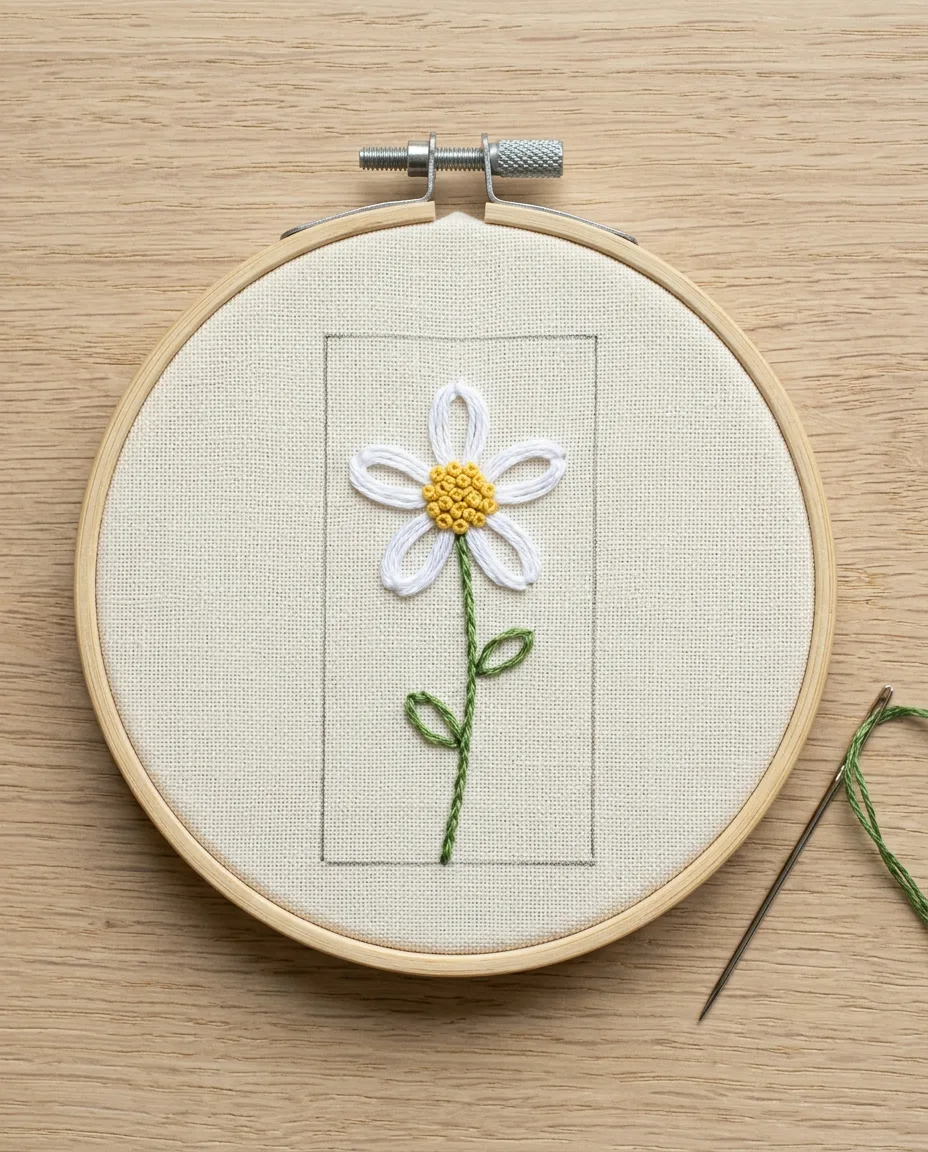
- Mark a rectangle 2 by 7 inches with the pen and a ruler. On felt, cut it out now. On linen, draw it but leave the fabric whole so it still fits the hoop.
- Draw the design inside the top 3 inches. A single daisy or a lavender sprig fits well. Keep every mark at least 1/4 inch in from the edge line.
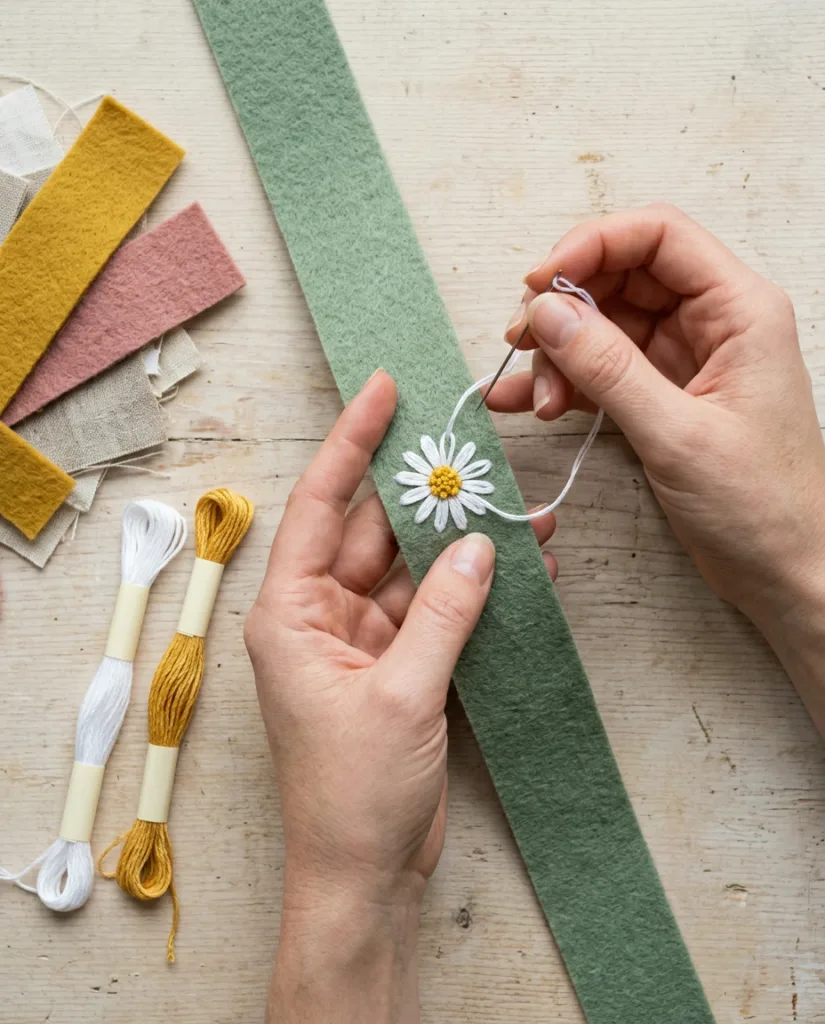
- For felt, hold the strip in your hand and stitch straight onto it. For linen, center the top half of the rectangle in the 4 inch hoop and tighten it until the fabric sounds like a drum when tapped.
 Save
SaveHands stitching a white daisy onto a strip of sage green felt - Work the stems first in stem stitch with 2 strands and a size 7 needle. Keep each stitch about 3 mm long (just over 1/8 inch).
- Add the petals in lazy daisy and finish with French knots for the flower centers or berries.
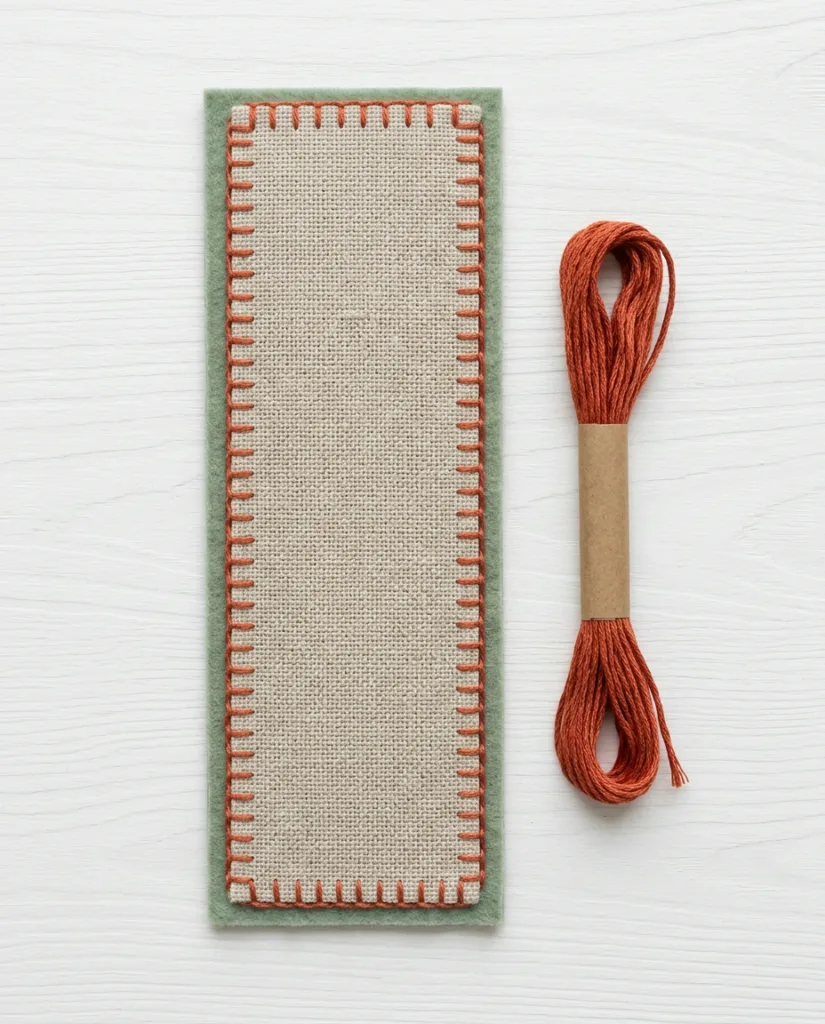
- For linen, take it out of the hoop and iron fusible web onto the back of the stitched area. Peel the paper, cut out the rectangle and fuse it onto the felt backing strip. Trim the felt flush with the linen.
- Thread 3 strands into a size 5 needle and work blanket stitch all the way around the edge. On linen, go through both layers.
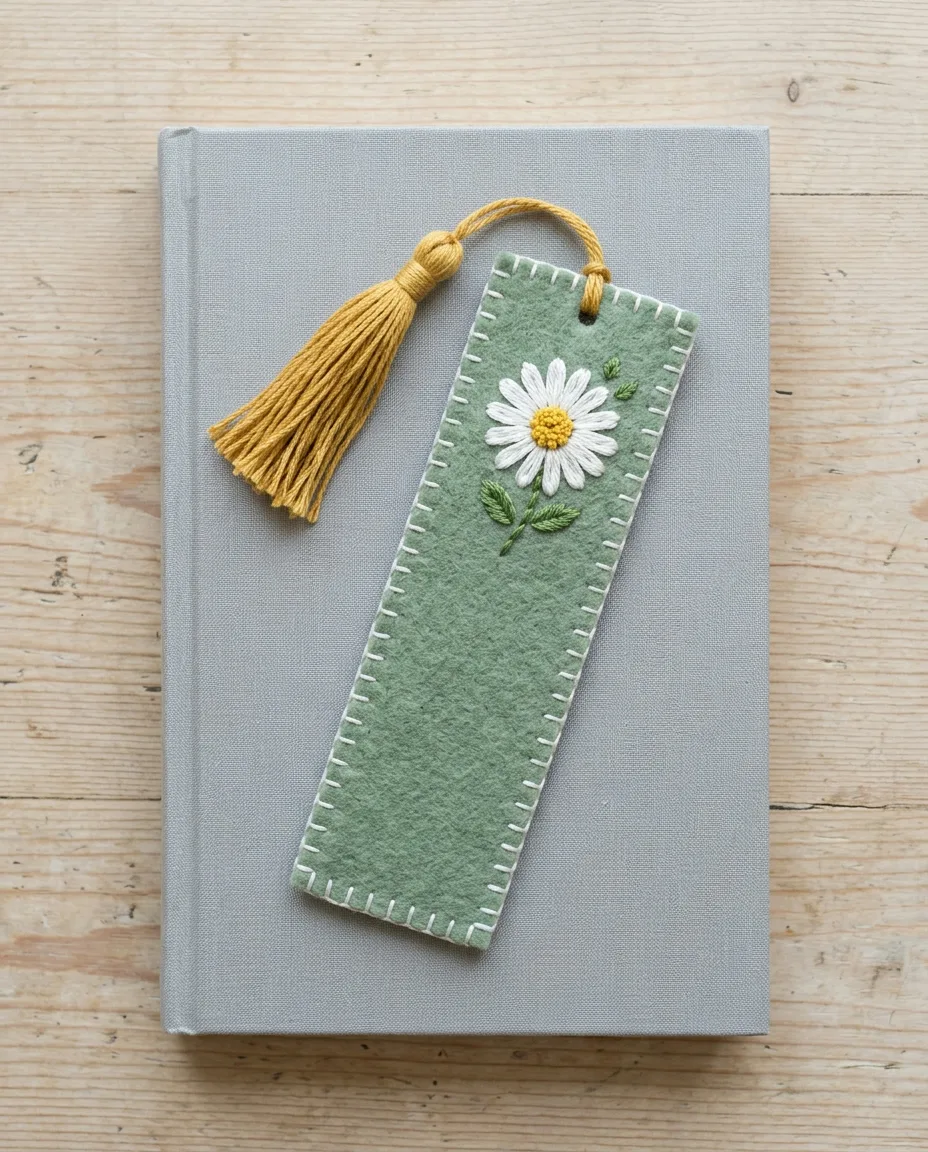
- Knot a tassel through a small hole at the top, centered 1/2 inch down from the edge.
Rinse off water-soluble pen lines with a damp cloth before you iron anything. Heat can set some of them permanently.
Felt or linen: which base to choose
Felt is faster. There is no hoop and no fusing step. Buy wool-blend felt, around 20 to 35 percent wool, rather than the thin acrylic sheets sold for kids’ crafts. Acrylic felt stretches as you stitch and pills along the edge after a few weeks in a book.
Linen looks finer. The weave shows through the stitches and gives the bookmark a softer, handmade look. But it needs the hoop and the felt backing, which adds about 30 minutes. It also frays the moment it is cut. That’s why the fusible web goes on before the scissors do.
Thickness matters in one direction only. A bookmark over about 2 mm thick leaves a gap in a paperback and strains the spine. One layer of felt, or linen fused to felt, stays under that. Two layers of felt do not.
Size the strip to the books it will live in. The 2 by 7 inch rectangle suits a standard paperback and most novels. For a large hardcover or a cookbook, cut 2 1/2 by 8 inches so the top still clears the pages by about an inch. Narrower than 1 1/2 inches, and a flower loses its petals to the edge stitching.
Stitch the design at bookmark scale
Two inches of width changes the rules. Details that read well in a 6 inch hoop turn into a smudge here, so choose a single motif and give it room.
Stem stitch makes the stems and vines. Bring the needle up, go down about 3 mm ahead, then come up again halfway back along that stitch, keeping the loop of thread on the same side every time. The result is a thin twisted line, like a cord.
Lazy daisy makes each petal or leaf. Come up at the base of the petal and go back down in the same hole, leaving a small loop. Bring the needle up at the tip of the petal, about 6 mm away, inside the loop. Then go down just outside the loop to tack it in place. Five petals around a center make a daisy.
French knots fill the centers and berries. Wrap the thread twice around the needle, not more, and go back down one fabric thread away from where you came up. On linen, that small gap stops the knot from sinking through the open weave. The French knot tutorial covers the wrap and the pull in detail.
 Save
SaveVertical designs suit the shape best. A lavender stalk runs along the length of the strip, and the lavender embroidery guide shows how to build the buds from lazy daisy stitches. A single initial also works, stitched about 1 inch tall in backstitch.
Blanket stitch holds the edge together
This is where most bookmarks go wrong. An uneven edge is the first thing anyone notices, far more than a lopsided petal.
Work from left to right with the edge of the bookmark toward you. Anchor the thread so it comes out right at the edge. Push the needle in from the front, 4 mm in from the edge and 4 mm to the right. Bring its tip out at the edge, with the thread looped under it. Pull until the loop sits flat along the edge. Each stitch is a small upside-down L.
Keep every stitch the same height and the same gap apart. A ruler helps for the first inch, and after that your eye takes over. At each corner, make three stitches into the same corner hole, fanning them out, so the thread turns the corner without leaving a bare gap.
 Save
SaveTo join the start and finish, slide the needle under the first stitch’s loop, then take it down into the fabric. Hide the tail by running it between the layers for about 1 inch before trimming.
A tassel in ten minutes
Wind floss about 20 times around a 3 inch piece of card. Slide a 6 inch length of floss under the loops at one end and tie it tight. That tie becomes the hanging cord. Cut through the loops at the other end.
Wrap another short length of floss around the bundle about 1/2 inch below the top and knot it at the back. Trim the ends even. Push the hanging cord through the hole at the top of the bookmark with a size 5 needle, then tie it off in a double knot.
 Save
SaveMatch the tassel to one color in the design. A tassel the same color as the blanket stitch blends into it and looks unfinished.
Mistakes that show on a thin strip
Pulled stitches cause most problems. On felt, tight stitches dent the surface and the strip curls toward the design. Pull each stitch until it lies flat, then stop.
Knots on the back show through thin linen as small bumps. Start with a waste knot instead: knot the thread, go down about 2 inches from where you’ll stitch, and cut the knot off once a few stitches have covered the tail on the back.
Nothing hides a design faster than bad placement. A design placed too low gets hidden inside the book. Keep everything in the top 3 inches, since that part sticks out above the pages.
And fusible web that goes on at the wrong heat lifts at the corners within a week. Follow the temperature on the package and press for the full time it gives. Keep the iron off the stitching itself by pressing from the back through a cloth.
Care and gifting
Neither version should go in a washing machine. Felt pills and loses its shape. Linen fused to felt can separate. Spot-clean with a damp cloth and let it dry flat under a heavy book.
A bookmark is one of the few embroidered gifts that can be started and finished on the same night. It also mails in a regular card envelope. For more small projects on a short deadline, see the list of last-minute embroidery gifts.
Safety note: needles, small scissors and loose floss stay out of reach of young children while you work.