A woman sits on her porch step with a stone-colored ball cap on her knee. Her left hand is inside the crown, pressing the front panel out from behind. Her right hand pushes a needle straight down through the fabric, then reaches in to pull it through. No hoop is anywhere near her. Twenty minutes in, she has three petals of a daisy and a sore thumb, and the sore thumb is the only part she got wrong.
Hand embroidery on a hat works. It just works differently from a flat piece of cotton in a hoop. The crown curves, the front is often stiffened, and the brim usually hides a plastic insert. Each of those needs its own small trick. None of them needs a machine.
This guide covers a small flower spray on the crown front, then a simple line along the brim. Budget about 3 hours for both.
How to stitch a design on the crown
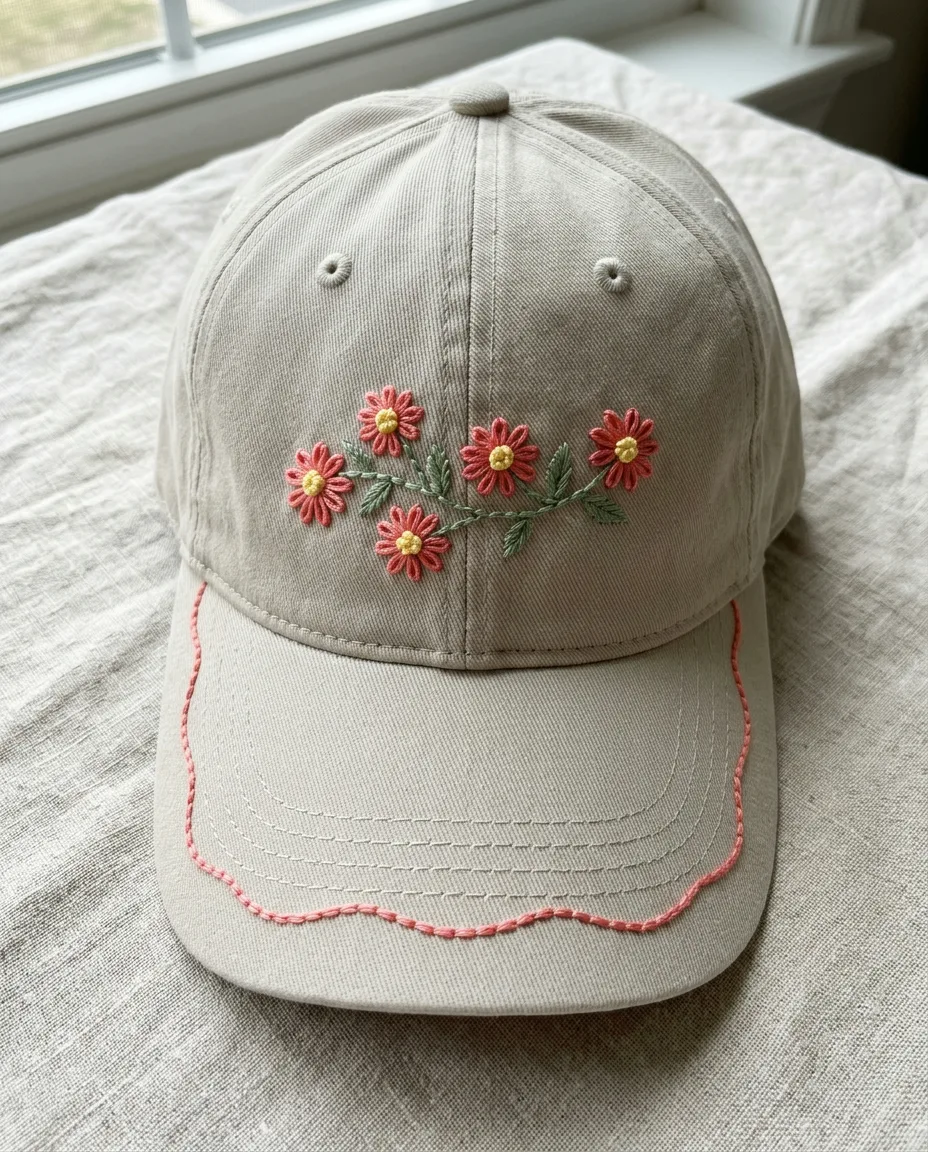
Start with the front of the crown. It is the flattest part of the hat and the place people look first. Keep the design small, about 2 inches wide and 1 1/2 inches tall. Anything bigger wraps around the curve and looks bent from the side.
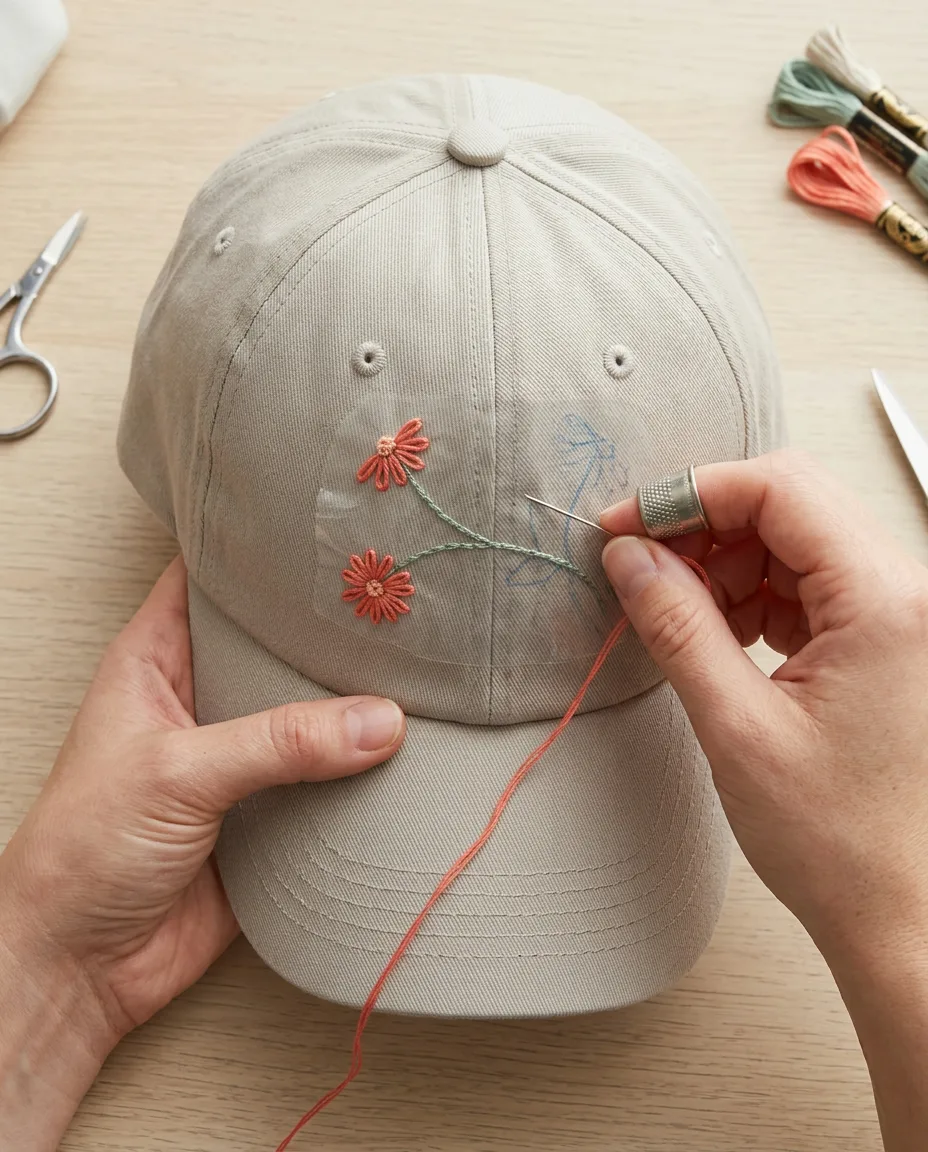
First, check what you are stitching through. Press the front panel with your thumb. If it bends like a shirt, the cap is unstructured and the size 5 needle will do. If it springs back like cardboard, there is a stiff layer called buckram glued behind the front. Switch to the chenille needle and put the thimble on now. Waiting until the first blister is too late.
 Save
- Find the center front. Most caps have a seam running straight up the middle of the front, or a single wide front panel. Mark the center with a pin about 1 inch above the brim.
- Draw your design onto the stabilizer. A good first design is a curved stem about 2 inches long with four five-petal daisies along it and a few leaves. Draw it on the smooth side, then peel the backing off.
- Stick the stabilizer to the crown front, centered on the pin. Smooth it from the middle outward so it follows the curve without wrinkles. Remove the pin.
- Cut a piece of floss 18 inches long. Floss is six thin threads twisted together. Pull out 3 of them one at a time, then put them back together and thread the needle. Shorter thread matters here, because pulling through buckram frays it fast.
- Tie a small knot in the end. Reach in through the back opening of the cap and bring the needle up from inside at one end of the stem.
- Work the stem in backstitch. Take a stitch about 3 mm long (just over 1/8 inch), come up 3 mm ahead, and go back down into the end of the last stitch.
- Stitch every petal as a lazy daisy. Come up at the flower center, go back down in the same hole, and leave a small loop. Come up at the tip of the petal, inside the loop, and tack it down with a tiny stitch over the thread.
- Fill each flower center with a French knot. Wrap the thread twice around the needle, go down one fabric thread away from where you came up, and hold the wraps snug as you pull through.
- Use a stab motion for every stitch. Push the needle straight down, pull it all the way through from inside, then push it straight up. Scooping in and out in one motion does not work on a curved crown.
- End each thread inside the hat. Slide the needle under three or four stitches on the back, then snip the tail to about 1/4 inch.
- Rinse the stabilizer off. Hold the crown front under a cool tap for a minute, or press a wet cloth on it until the film goes soft and slides away. Stuff the crown with a rolled towel so it dries in shape.
Buckram fights back. On a stiff front, each pass takes real force, so push with the thimble and pull with your fingertips. A pair of flat pliers helps if the needle sticks halfway, but grip only the shaft. Pliers on the eye can snap it. Take breaks, too. Ten minutes of buckram is plenty for one hand. For more on the knot itself, the French knot tutorial walks through the wraps in detail.
The brim needs a different plan
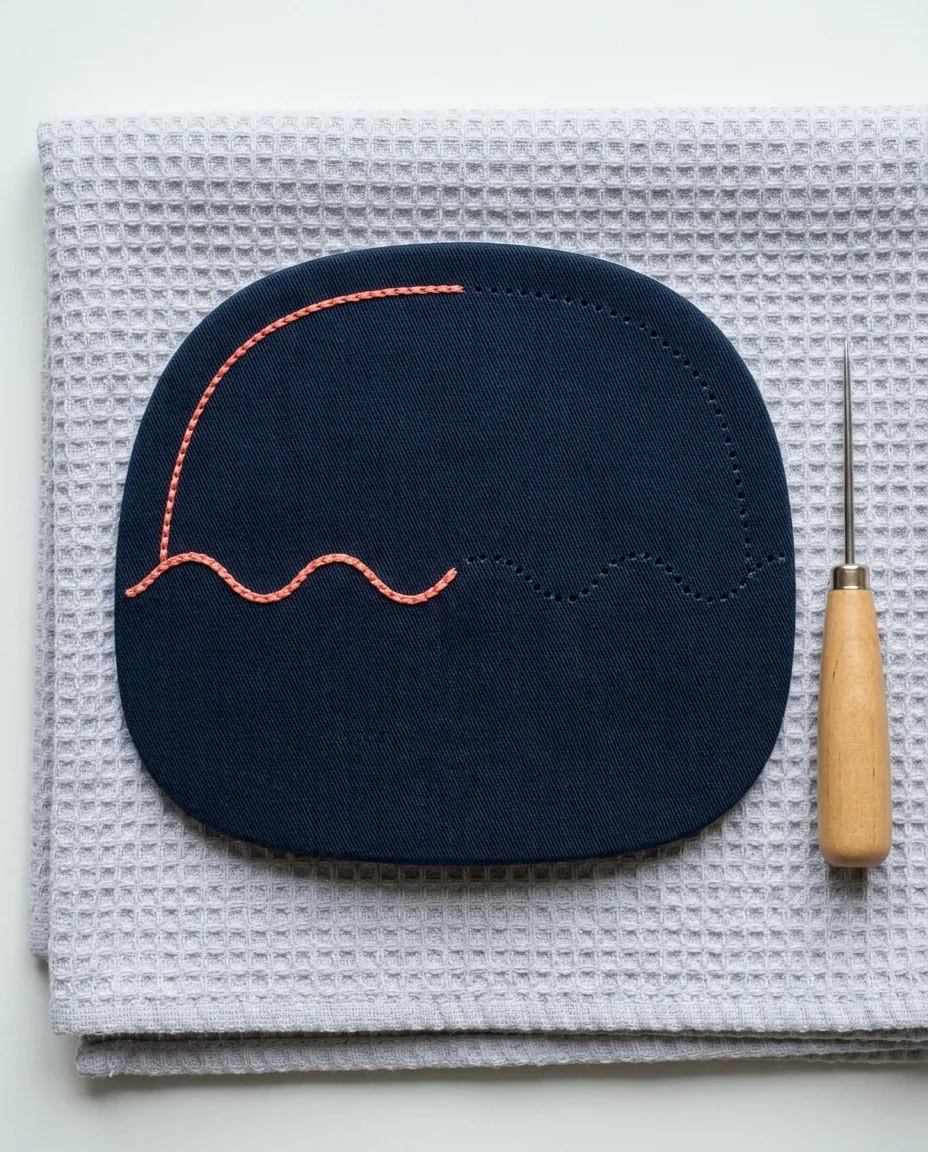
Almost every baseball cap brim has a thin plastic insert inside the fabric. A needle will not pass through it on its own. So you make the holes first.
Draw a simple line on the brim with a pencil, such as a gentle wave that follows the edge about 1/2 inch in. Then press the awl straight down through the brim at every stitch point, spaced about 4 mm apart. Work on a folded towel or a cork board so the point has somewhere to go. Once the holes are made, stitch through them in backstitch with the chenille needle and 3 strands.
 Save
The underside of the brim will show your thread. There is no inside to hide it in. Keep the back tidy by starting with a knot tucked right under the brim edge and ending the same way. A single color line looks deliberate from below. A tangle of knots does not.
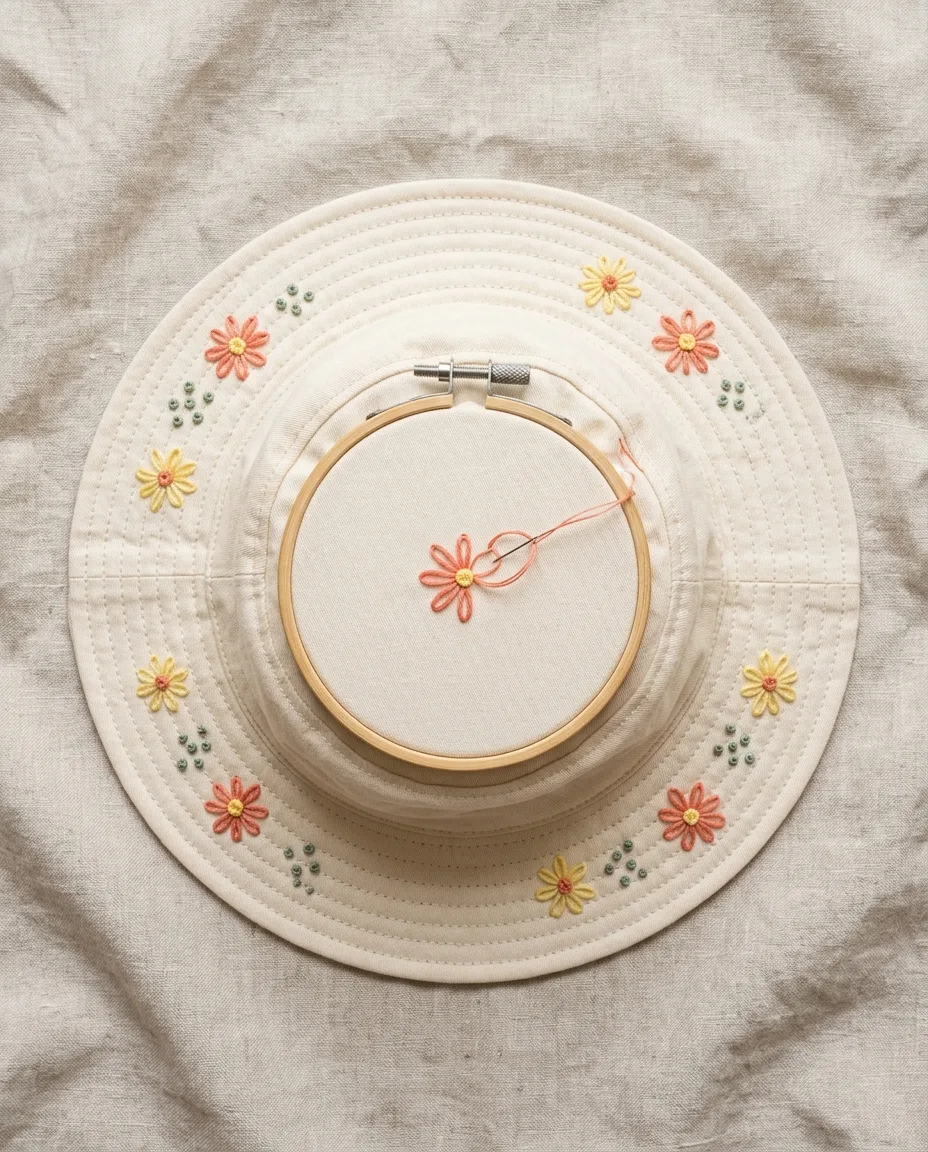
But soft brims are easier. A bucket hat brim is just layers of cotton with rows of machine topstitching, and the size 5 needle goes straight through. Stitch between the rows of topstitching so the design sits in its own lane. French knots and single lazy daisies scattered around the brim look good here, and they take about a minute each.
Old caps are the exception worth knowing about. Some older caps have a cardboard brim insert. Cardboard softens when wet, so a brim design on one of those must never be rinsed. Skip the water-soluble stabilizer and draw straight on the fabric with a pencil you can brush off.
Pick a hat your needle can get through
Cotton twill is the easiest cap fabric to stitch. Mesh trucker backs are harder, because the holes are bigger than your stitches. Nylon sports caps are slippery, and the stitches sink into them. Wool felt fedoras can take hand embroidery, but water would ruin their shape, so they need tear-away tissue paper, a thin backing you rip off once the stitching is done.
Unstructured caps are the kindest place to start. Their fronts are soft, and you can almost hoop them. On a bucket hat you can go further. A 4 inch hoop will clamp around a flat section of the crown if you work from inside the hat. It keeps the fabric tight. That means neater satin stitch and fewer puckers. Loosen the hoop screw all the way first, or it will crush the brim seam.
 Save
Ten feet is the distance a hat gets seen from, so color matters more than on a hoop on the wall. At that distance, pale floss on a pale cap disappears. Pick thread at least two shades darker or lighter than the fabric. Navy caps take coral and butter yellow well. Stone and khaki caps take deep green and rust.
Lettering is possible too. A single initial in split stitch fits nicely on the side panel of a cap. Whole names need more room and more care with spacing, and the guide to stitching names by hand covers that.
Mistakes that show from across the room
Long satin stitches are the big one. Satin stitch is a fill made of straight stitches laid side by side. On a flat hoop, stitches up to 1/2 inch long look fine. On a hat, anything over about 8 mm (5/16 inch) snags on hair and car headrests. Then it pulls loose. Split large shapes into smaller sections, or fill them with rows of backstitch instead. A leaf 1 inch long works best as two halves, each angled toward the center vein.
Never pull too tight, either. The curve of the crown hides it while you stitch, but once the hat is on a head, tight stitches pucker the fabric into little ridges. Pull each stitch until it lies flat and then stop.
Then there is the center seam. Stitching straight through a thick seam is slow, and the seam lumps up under the design. Plan the flowers to sit either side of it, and let only the stem cross it. If a stitch has to go through the seam, use the chenille needle even on a soft cap.
Starting knots can also come through. Twill caps have a looser weave than you might expect. Tie a double knot, or leave a 2 inch tail inside and catch it under the first few stitches. Both hold.
Skipping the thimble is the mistake that ends projects early. A buckram front will push the needle eye into your fingertip on every stitch. One thimble costs less than a spool of floss.
Washing and wearing it
Hand wash only. Fill a sink with cool water and a little mild soap, then swish the hat for a minute and rinse. Never put an embroidered cap in a dryer. Heat can shrink the cap and loosen the thread tension, and the brim may warp.
Reshape the crown over a bowl or a rolled towel while it dries. Leave it out of direct sun, since some floss colors fade faster than the cap fabric. If you stitch denim next, the same stab-stitch approach carries over, and the jeans embroidery guide picks up from there.
Keep children away from loose needles and the awl while you work. Both are sharp enough to go through a brim, so they will go through a finger.