Short answer
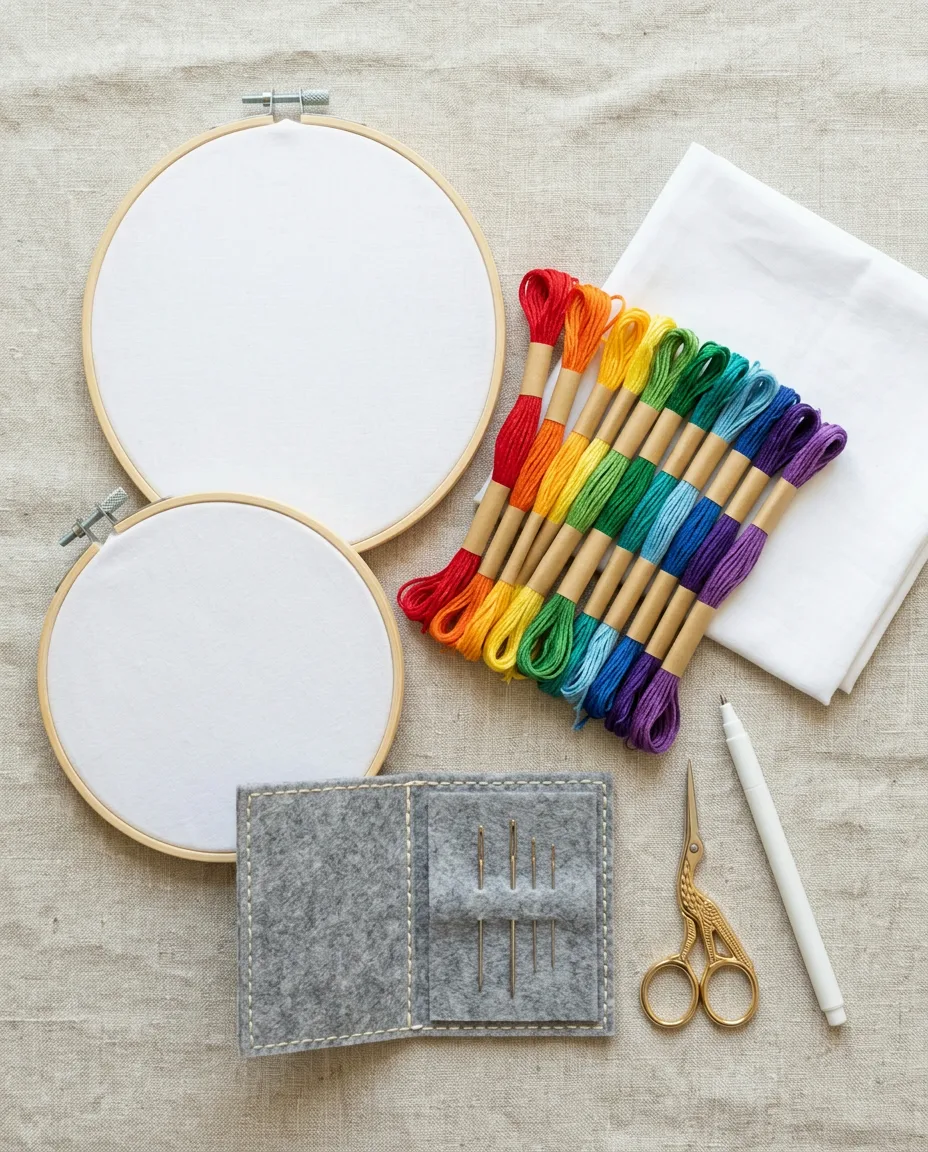
Buy a 6 inch wooden hoop, plain cotton or linen, six-strand floss in a few colors, size 5 to 7 embroidery needles, small sharp scissors and a water-soluble pen. Then stitch a five-row sampler with 2 strands of floss before starting a real project.
Two strands out of six. That ratio answers more beginner questions than any supply list. Six-strand embroidery floss is a loose bundle of six thin threads, and almost every starter design uses just two of them at a time. Thread all six and the lines turn thick and lumpy, and the fabric fights every stitch.
Day one’s other needs are just as small. Six supplies and a single practice piece cover it, and two hours is a fair budget. Below is what to buy and what to skip. Then come the five stitches to learn first.
What to buy on day one
Everything below fits in a sandwich bag. None of it needs to be expensive, but a few details on each item matter.
| Item | What to get | Why it matters |
|---|---|---|
| Hoop | One 6 inch wooden hoop with a screw at the top | Big enough for a practice piece, small enough to hold in one hand for an hour |
| Fabric | Plain quilting cotton or medium-weight linen, about a 10 inch square | A tight, even weave that won’t stretch and shows your stitches clearly |
| Floss | Six-strand cotton floss in 4 to 6 colors | The standard embroidery thread; you split it into 2 or 3 strands |
| Needles | Embroidery (crewel) needles, sizes 5 to 7 | Sharp points plus an eye long enough for 2 to 3 strands |
| Scissors | Small, sharp embroidery scissors | Clean snips right against the fabric |
| Marker | Water-soluble fabric pen | Draw the design, then rinse the lines away in cool water |
Needle sizes run backward. A size 7 is finer than a size 5. Use the size 7 with 2 strands and the size 5 when you move up to 3. If threading feels like a fight, the needle is too small for the floss.
Pre-made kits are a fine shortcut, as long as the kit has a real wooden hoop and cotton floss. The fabric guide goes deeper if you would rather choose your own cloth.
Leave these on the shelf for now
Stretchy fabrics come first on that list. T-shirt knits and anything with spandex pucker badly without stabilizer, and stabilizer is a second-week skill. Plastic hoops that clip shut are the other thing to skip. They rarely grip fabric evenly, and you will spend the afternoon re-tightening instead of stitching. Metallic thread can wait too, because it frays and kinks even for experienced hands. A large hoop is less of a problem than it sounds, but anything over 8 inches gets tiring to hold. Start small and add tools once a project asks for them.
Hoop the fabric until it sounds like a drum
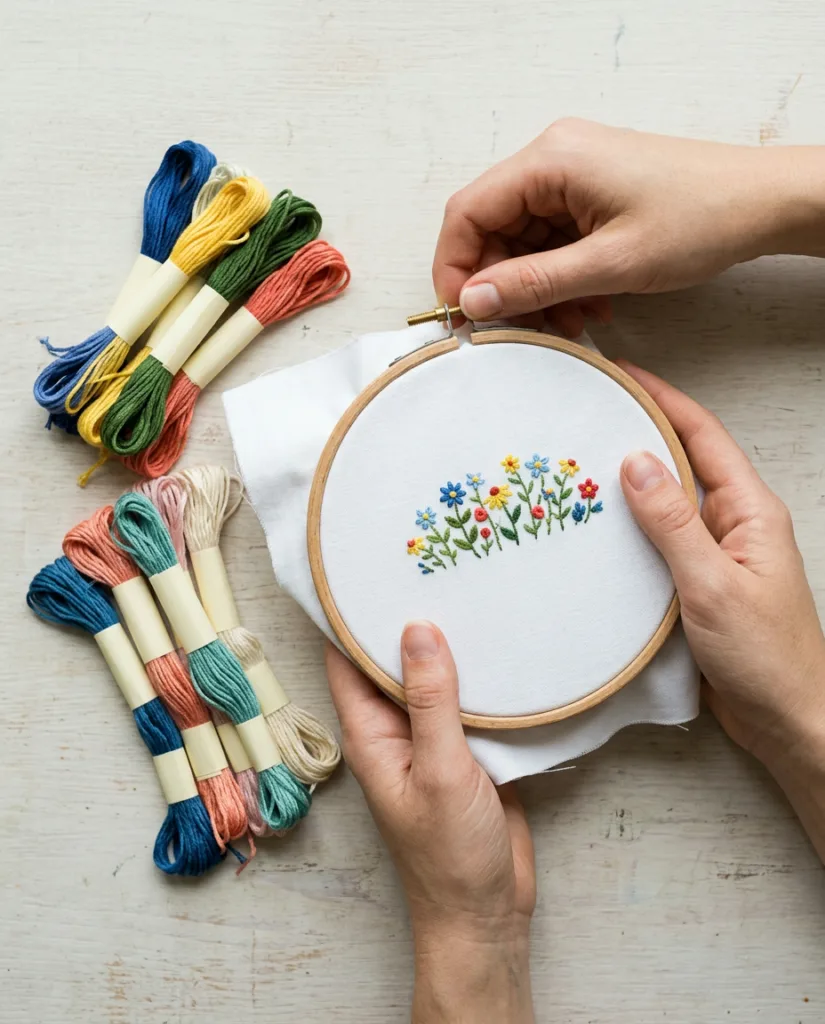
Loose fabric causes more beginner trouble than bad stitching does. Loosen the screw and separate the two rings. Lay the fabric over the inner ring, press the outer ring down on top and tighten the screw about halfway.
Now pull the fabric gently outward all the way around, a little at a time, keeping the weave straight. Tighten the screw the rest of the way. Tap the center with a fingertip. It should sound flat and tight, like a small drum.
 Save
SaveCheck it again every 30 minutes. Fabric relaxes as you work, and slack fabric is the main reason stitches gather into ripples. The puckering fix walks through the other causes if it happens anyway.
Separate the floss and thread the needle
Cut a piece about 18 inches long, roughly the distance from your fingertips to your elbow. Longer pieces tangle and wear thin before you reach the end.
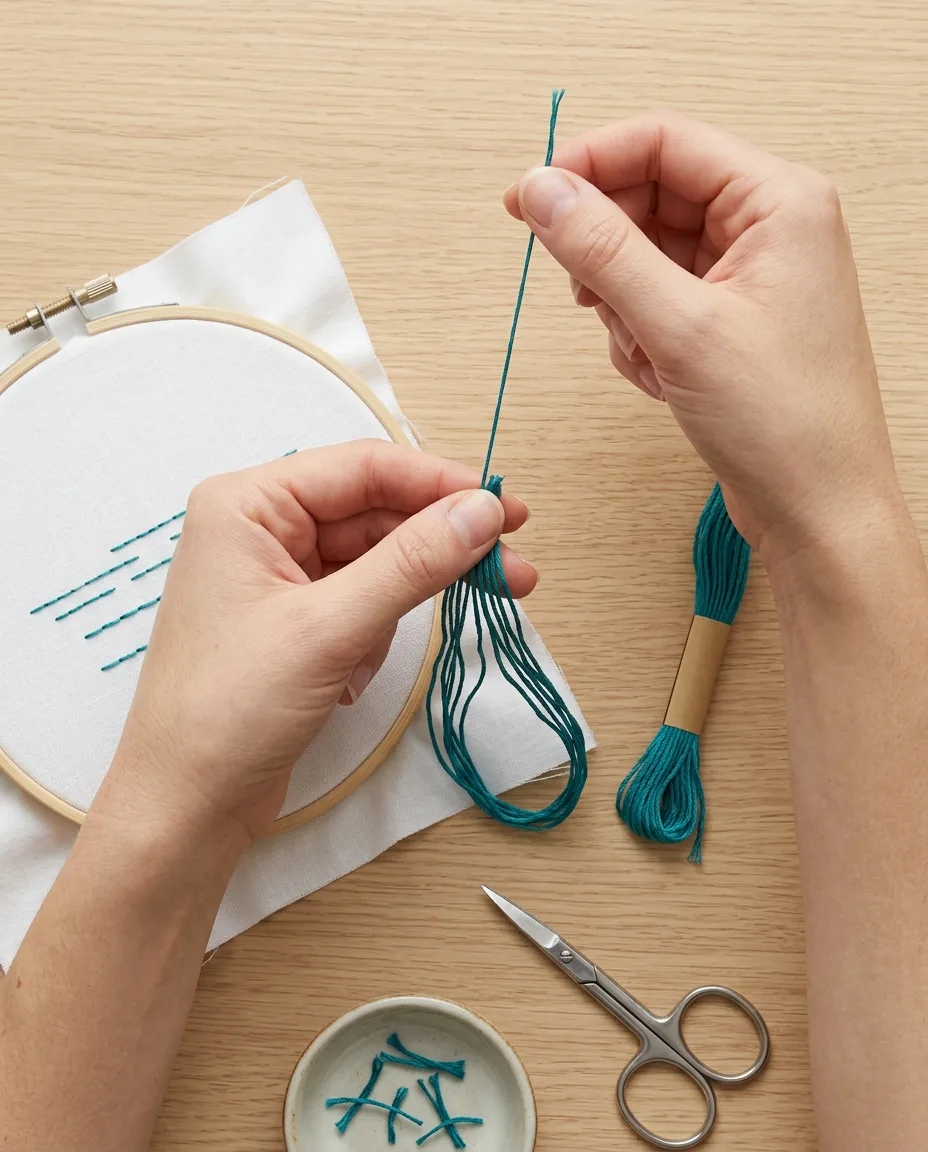
Pinch the cut end and fan the strands apart. Pull one single strand straight up and out of the bundle while the rest slide down and bunch. Do that twice, then lay the two strands side by side. Pulling two at once is tempting. It twists the whole bundle into a knot.
 Save
SaveThread both strands through the size 7 needle. Leave a short tail of about 3 inches and tie a small knot in the long end. For a tidier back later, use a waste knot instead. Go down through the front about 2 inches from where you will start, with the knot sitting on top. Stitch toward it so your stitches cover the thread on the back. Then snip the knot off the front.
Draw your design without a pattern
No printed pattern is needed. Draw straight onto the hooped fabric with the water-soluble pen, pressing lightly. Five horizontal lines about 1/2 inch (12 mm) apart make the sampler below.
For a picture, trace a photo or your own doodle. Tape the drawing to a bright window, tape the fabric over it and follow the lines you can see through it. Then hoop the fabric. Keep the drawing simple, with lines no closer than 3 mm, since stitches need a little space.
And don’t iron the fabric while pen lines are still on it. Heat can set some water-soluble inks for good.
A five-row sampler to stitch first
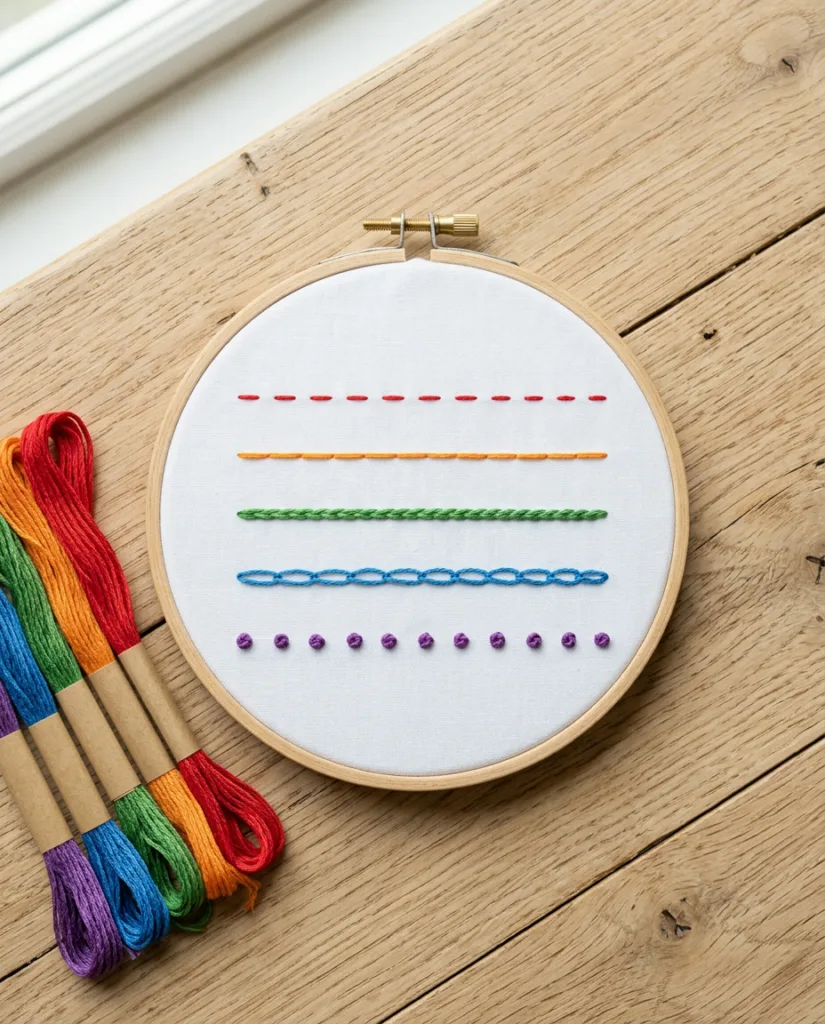
Stitch one row of each of these along your five lines, using 2 strands and the size 7 needle. Together they cover most beginner designs.
- Running stitch. Come up, go down 4 mm (about 1/8 inch) along the line, then leave a 2 mm gap and come up again. Keep the stitches the same length and the gaps the same size.
- Backstitch. Make one stitch 3 mm long. Come up 3 mm farther along the line, then go back down into the end of the last stitch. The result is a solid line with no gaps.
- Stem stitch. Make a 3 mm stitch. Come up halfway along it, just to one side, and keep the loose thread on that same side every time. The stitches overlap into a twisted, rope-like line that suits stems.
- Chain stitch. Come up, then go back down into the same hole, leaving a small loop on top. Come up 3 mm ahead, inside the loop, and pull until it lies snug. Repeat, and finish the last loop with a tiny stitch over its far end.
- French knots. Come up, wrap the thread twice around the needle and go back down right next to where you came up. Hold the thread tight with your other hand while you pull through. The French knot tutorial covers the usual failures.
 Save
SaveExpect the first row to look uneven. By the fifth row your stitch lengths settle, and that consistency is the actual goal of the sampler.
Holding the hoop for an hour without aching
Grip the hoop by its edge with your non-stitching hand, fingers underneath and thumb on the rim. Keep the screw at the top, away from the path of the thread, so the floss doesn’t catch on it every stitch. Rest your forearm on a table or a cushion rather than holding the hoop up in the air.
Stitch in two motions. Push the needle down from the front and pull it through from below, then push it back up and pull from the front. It feels slow at first. It is also far more accurate than trying to scoop in and out of the fabric in one pass, which pulls the weave out of line on a tight hoop.
Take a break every 30 to 40 minutes. Loosen the screw a little when you stop for the day, because a hoop left clamped overnight can leave a crease ring in the fabric that takes a rinse to remove.
How to end a thread neatly
Stop when about 3 inches of floss is left on the needle. Turn the hoop over. Slide the needle under four or five stitches on the back, pull through and trim close. No knot is needed, and the back stays flat enough to frame.
Mistakes almost everyone makes on day one
- Pulling each stitch until the fabric dimples. Stitches should rest on the surface, snug but not tight.
- Threading all six strands, which makes thick lines and bends the needle.
- Working with floss longer than an arm, which knots constantly.
- Letting the fabric go slack partway through.
- Carrying thread across the back between distant shapes. It shows through light fabric, so tie off and start again instead.
Most of these share a cure. Slow down. Speed comes with practice, and early speed mostly produces knots.
Your first real project
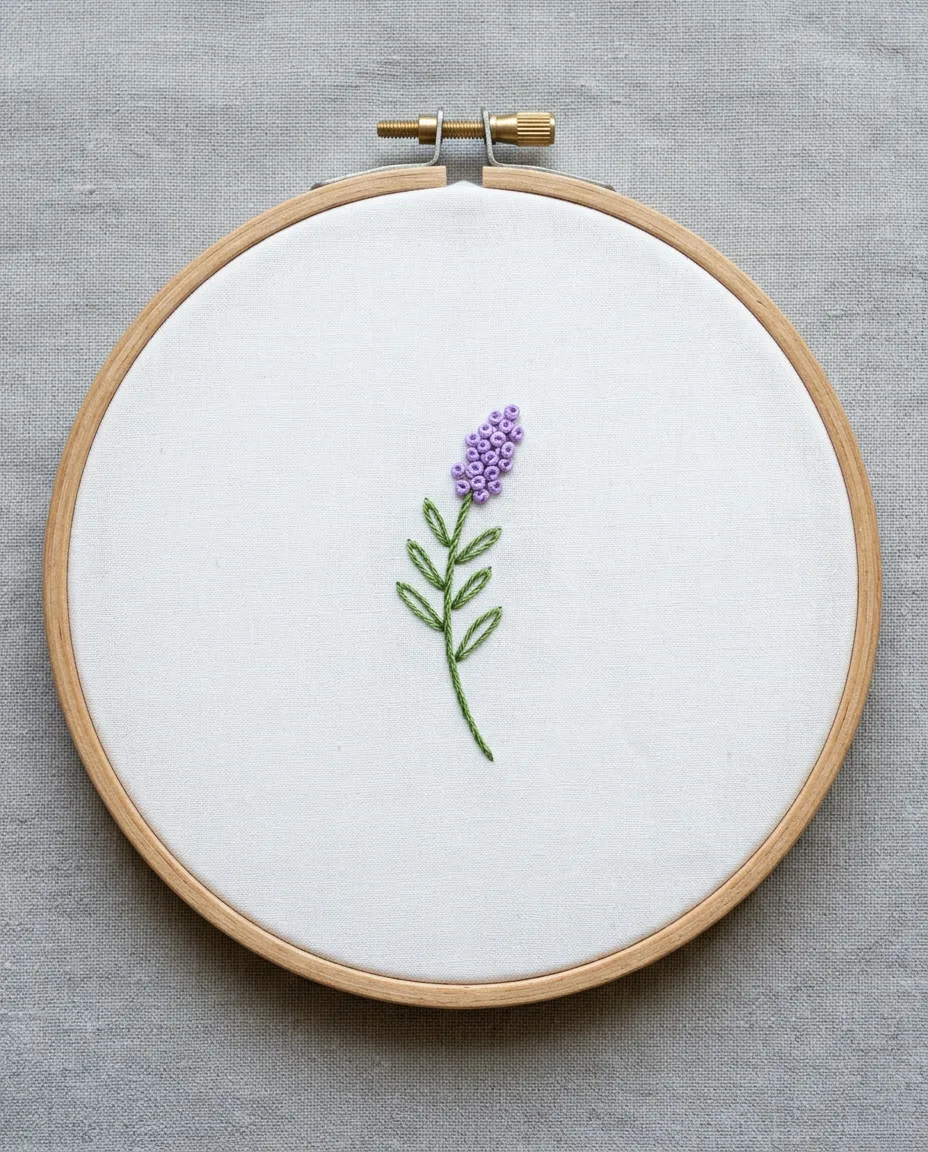
One simple sprig uses every stitch on the sampler. Draw a 3 inch curved stem in the center of a fresh piece of fabric. Stitch it in stem stitch with 2 strands of green. Add five or six short backstitch leaves along the top half, then cluster French knots at the tip for flower buds.
 Save
SaveThat takes about an hour in a 6 inch hoop. Rinse the finished piece in cool water to lift the pen lines, let it dry flat, and press it face down on a towel so the stitches stay raised. Frame it right in the hoop, or trim the fabric and turn it into a patch once you trust your backstitch.